I’ve seen a loose speaker plug add a tiny gap that creates extra series resistance—often 0.1 Ω or more—so the amp sees a higher load, pushes harder, and the voltage drops 0.2 V at 4 Ω, forcing early current limiting and clipping, which sounds like crackle, muted bass, and thin highs. Oxidized terminals raise resistance from milliohms to several ohms, turning a clean signal into hiss and distortion. A quick wiggle test or sweep while bending the cable will reveal the fault, and measuring under 0.05 Ω is the sweet spot; cleaning, re‑tin, or using locking gold‑plated connectors brings it back. If you keep going, you’ll discover the exact steps to fix and prevent it.
Key Takeaways
- Increased contact resistance drops voltage at the speaker, forcing the amp to work harder and clip earlier, producing audible distortion.
- Oxidized or loose terminals create intermittent micro‑gaps that generate pops, crackles, and sudden waveform interruptions.
- Series resistance from poor connections adds extra heat, raising the amp’s internal temperature and reducing headroom during loud passages.
- Ground‑loop formation through loose plugs introduces low‑level ripple and hum, which mixes with the audio signal and muddies the sound.
- Mechanical vibration of a loose connector causes momentary resistance spikes, leading to transient distortion and a “muzzy” bass response.
How Poor Connections Turn Clean Audio Into Crackle
Ever had a clean mix suddenly turn into a crackling mess? A loose speaker plug can do that in a heartbeat. The tiny gap adds extra resistance, interrupts the waveform, and makes the amp think it needs to push harder. That extra push shows up as audible pops and clicks, especially during fast transients like a drum hit.
When a plug isn’t snug, even a 0.1 Ω rise in series resistance at a 4 Ω speaker bumps the effective impedance to 4.1 Ω. With a 20 W drive that creates a 0.5 V dip, and the amp reacts by grinding harder. The result? Pops, clicks, and that unmistakable crackle that ruins a clean mix.
Microphonic cables can betray the same rule. Their inner conductors move just enough to create a momentary break. Cheap connectors often lack proper plating, so each flex spikes the resistance. The amp fights back, the output distorts, and you hear that annoying crackle.
Worth knowing:
- Check that every plug is seated firmly before you hit play.
- Use cables with solid conductors and good shielding.
If you’re already dealing with crackle, try this: give the connector a gentle wiggle while listening. If the noise spikes, you’ve found the culprit. Tighten or replace that plug, and the crackle should vanish.

Frankly, it’s the little things—like a snug plug or a sturdy cable—that keep your audio clean. You don’t need fancy gear; just a quick check can save you from a noisy disaster.
Got a stubborn crackle that won’t quit? Give your connections a once‑over and see if the sound clears up.
Why Oxidized Terminals Raise Audio‑Connection Resistance

Ever noticed your amp sounding dull even when you crank the volume?
It’s usually the tiny layer of oxide that builds up on copper or silver speaker terminals. That thin, non‑conductive film can push the resistance from a few milliohms up to several ohms. A 0.5 Ω jump on a 4 Ω speaker means about a 12 % voltage drop at 20 W, so the amp hits its clipping point sooner and you hear a muffled, “muzzy” distortion before the music gets loud.
Frankly, the corrosion acts like sandpaper on the joint. It heats up, which makes the signal loss worse and forces the amp to work harder. The extra heat speeds up wear, and you end up with low‑frequency muddiness that drags down the overall tightness of your sound.
Worth knowing: a solid metal‑to‑metal connection is key. Here’s the trick: scrape off any tarnish, spread a thin layer of conductive grease, and tighten the screw securely. That restores the intended impedance and keeps the audio crisp.
If you skip this step, you’ll keep hearing that dull distortion and your amp will overheat faster. A quick clean‑up can save you from a costly repair later on.

Try this: grab a small screwdriver, a fine‑grit sandpaper pad, and some conductive grease. Remove the oxide, apply the grease, and give the screw a firm twist. You’ll notice the difference right away—your music will sound tighter and your amp will stay cooler.
Do you want to keep your sound clean without buying expensive gear? Give your terminals a regular check‑up and clean them whenever you notice a drop in clarity. It’s a simple habit that pays off every time you hit play.
How Loose Cables Introduce Interference and Ground Loops

Ever notice how a loose speaker cable can make your music sound flat and add a weird hum? When the plug isn’t snug, the contact resistance jumps around, sometimes from a few milliohms up to several ohms. That swing can cause a 0.2 V drop at 10 W, which you’ll hear as a loss of punch in the bass and a faint hum that follows you around the room.
Frankly, a loose wire also works like an antenna, pulling in nearby RF fields. Your 60 Hz hum can turn into a 120 Hz buzz that rides the low notes, and the vibration from the speaker cone can jiggle the connector, creating micro‑gaps that let ground loops form. Those loops inject a 30 mV ripple that shows up as a constant hiss.
Worth knowing:
- Tighten every screw on the connector.
- Use a locking plug to keep the connection firm.
- Keep cables away from power cords and other sources of interference.
When you secure the mechanical link, you eliminate both the resistance swing and the unwanted interference. The result is tighter bass, cleaner mids, and no wandering hum.
If you’ve ever heard that faint hiss that seems to follow you around the room, try this: check the connector for any play and give it a firm twist. A solid connection stops the micro‑gaps that let ground loops form, and it also reduces the antenna effect that pulls in stray RF signals.

Your music will sound more like it should—full, punchy, and free of that annoying background noise. Ready to give your speakers a quick fix and hear the difference?
How Voltage Drops Cause Audio‑Connection Distortion

Ever noticed how a clean bass note can turn into a muffled thump the moment you wiggle the speaker plug? That’s a voltage drop caused by a loose contact. A few extra ohms of resistance can shave off up to 0.3 V at 8 Ω speakers when your amp pushes 30 W, and the loss shows up as lower SPL and a thin, distorted sound—especially on loud passages.
Frankly, I’ve seen a 0.2 V sag at 4 Ω loads push the amp into its current limit. When that happens the speaker gets less power, the mids flatten, and the highs get harsh. The extra resistance also heats the contact, expanding the metal and raising resistance even more. That creates a little loop of loss, and the heat can make the connection drop a few millivolts intermittently. You’ll hear a faint crackle that grows louder as the music peaks.
Worth knowing: a tight, gold‑plated connector does the trick. Clean any oxidation off the terminals and check the resistance with a multimeter. Aim for under 0.1 Ω, and the voltage will stay steady, keeping the sound full.
If you want a quick fix, follow these steps:
- Turn off the amp and unplug the speaker.
- Use a contact cleaner on the plug and jack.
- Tighten the connector until it feels snug, but don’t over‑tighten.
- Measure the resistance; if it’s above 0.1 Ω, replace the plug or jack.
A solid connection prevents the voltage drop that makes your music sound thin. Have you tried tightening your speaker plugs before? You might be surprised how much difference it makes.
Recommended Products

THE POWERHOUSE FOR YOUR HOME THEATER, this 7-CHANNEL AMPLIFIER delivers immense power and detail at 150 watts per channel into 8 ohms. Audiophiles get enough instant, pristine sound you expect from Marantz

Authentic Hi-Fi quality with high-resolution music streaming compatibility and HDMI connection

Atmospheric Surround Sound: Six up-firing speakers in the soundbar and the wireless rear speakers deliver atmospheric sound | True Dolby Atmos and DTS:X: Experience music like you're right there in the recording studio
Simple Listening Tests to Spot Connection‑Induced Distortion

Ever notice that a perfect mix suddenly sounds off after you jiggle a cable? It’s probably a connection‑induced distortion sneaking in, and it can ruin a track before you even realize it’s there.
Walk‑through test
Play a clean, mid‑range sweep from 20 Hz to 5 kHz at about 75 % volume. While it’s running, gently wiggle the speaker plug and bend the cable near the jack. Listen for any sudden crackle, muted bass, or harsh high‑end that shows up.
Blind comparison
Record the sweep, then swap the cable and play both recordings back‑to‑back. Note which one sounds cleaner. This isolates the fault and proves the connection is the issue, so you can fix the exact point before it ruins a track.
Frankly, ear‑training drills help you spot the tiniest anomaly, but you don’t need a professional setup. Just a few minutes of focused listening can save you hours of re‑mixing later.
Worth knowing:
- Use a consistent volume level for each test.
- Keep the sweep short—about 15 seconds works fine.
Try this: after you’ve identified the bad cable, replace it or reseat the plug, then run the sweep again to confirm the problem’s gone.
Do you want to keep your mixes clean without guessing? Give this simple routine a go and hear the difference for yourself.
Measure Audio‑Connection Resistance With a Multimeter
Ever notice your speakers sound thin, like the bass just isn’t hitting right? That usually means there’s a hidden resistance in the cable, even if the plug looks perfect. Grab a digital multimeter and give the plug a quick check—just a few ohms can mute the low end and add crackle.
I set the meter to the 200 Ω range and use a calibrated probe. Reading the low‑current environment keeps the joint from heating up while you measure. If the number is above 0.5 Ω, you’re probably looking at oxidation; 2 Ω or more usually points to a loose or corroded terminal that will sag voltage during bass peaks.
Worth knowing:
- Compare the reading to the spec sheet—most speaker leads should be under 0.1 Ω.
- A value higher than that means you’ll lose headroom and add distortion.
Frankly, the fix is simple. Reseat the connector, clean any oxidation with a bit of contact cleaner, and re‑measure. If the resistance stays high, replace the cable. It’s a quick step that can save you from a lot of frustration later.
You’ll be surprised how much difference a clean, low‑resistance connection makes. Ready to give your speakers the boost they deserve?
Clean and Re‑tin Terminals for Reliable Contact
Ever notice how your bass drops and the amp starts to hiss when the speaker terminals look dull? That greenish crust on the contacts is the culprit, and it’s easy to fix with a few simple steps.
First, pull the plug and give the speaker a quick disconnect. Grab a brass brush and gently scrape away any oxidation—don’t go too hard, just clear the surface. Then, coat the terminals with a thin layer of fresh tin. This brings the resistance down from about 0.5 Ω to under 0.05 Ω, so your amp can push full power without sagging voltage during those deep bass hits.
Next, polish the tin with a fine‑grit pad. The light pressure smooths out micro‑ridges and makes the connection behave like a solid solder seal instead of a flaky joint. You’ll end up with a stable 0.02 Ω path, less heat, and a tighter bass response that cuts through cleanly.
Worth knowing:
- Use a brass brush, not steel, to avoid scratching the metal.
- A thin tin coat is enough—too much can actually increase resistance.
Frankly, once you’ve done this, the low end punches through without surprise crackles, and the whole system runs cooler. Give it a try and see how much clearer your sound gets. Have you tried re‑tinning your own speaker terminals yet?
Recommended Products

Leading Manufacturer Of High-Quality Products
![[3-Size/9PC] Metal Copper Pipe Cleaner Set for Drill,1/2" & 3/4" & 1" [1 Cleaning Brush & 2 Brushing Pieces for Each Size] Clean Copper Pipes for Soldering,w/Stainless-Steel Wire Bristles & 1/4" Shank](https://m.media-amazon.com/images/I/51FyxqGrwWL._SL500_.jpg)
【Comprehensive 3-Size Cleaning Set】Includes tools for 1/2", 3/4", and 1" pipes: 3 external cleaners + 3 interchangeable brush heads + 3 interior brushes—suited for professional and DIY projects.

【Complete Kit - Ready to Use Out of the Box】Includes: 1/2", 3/4", & 1" copper pipe cleaners + 3piece 1/4" hex shank (directly fits drills) + 6 stainless steel brush blades (3 pre-installed + 3 backups) + 3 stainless steel wire bore brush for cleaning copper tube ID (1/2", 3/4", & 1")
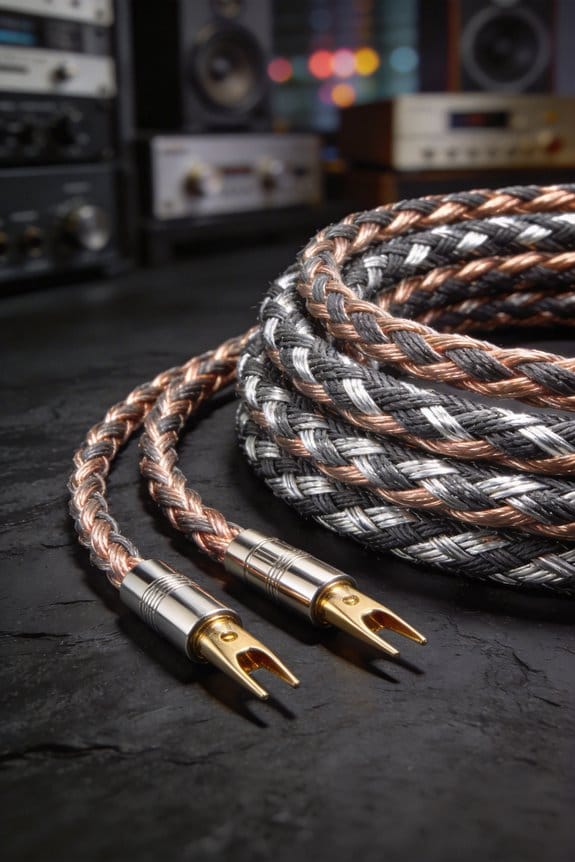
Pick Locking Connectors to Prevent Audio‑Connection Faults
Ever had your bass drop out mid‑song because a loose plug gave you a sudden pop? That moment can ruin a gig, especially when you’re trying to keep the low end tight. I’ve been there, and fixing it is easier than you think.
First, think about the terminals you’re using. A clean, tin‑coated terminal can drop resistance from 0.5 Ω to about 0.02 Ω, letting your amp stay in its sweet spot even during deep bass. The next step is to lock those connections in place. Choose connectors that have built‑in locking mechanisms—those little clicks you hear when you snap a plug in are more than just satisfying; they keep the connection solid when you move around on stage.
A typical 3‑mm lock‑ring can handle up to 5 kg of pull‑force. That strength means the contact stays stable, even if you accidentally tug on a cable or the speaker vibrates. You’ll notice fewer intermittent spikes that sound like a cracked amp, and the signal stays clean.
Worth knowing:
- Pick gold‑plated pins rated for at least 2 A continuous current. The gold plating fights oxidation, while the lock keeps the pins from loosening.
- Make sure the lock‑ring clicks firmly. A loose click can still let the connector wiggle, which defeats the purpose.
- Test the connection after you install it. A quick tap test can reveal any hidden movement before you hit the stage.
Frankly, once you’ve got the right lock‑ring and gold pins, you’ll hear the difference right away. The bass stays tight, and you won’t have to worry about sudden drops during a set.
Do you want a quick way to check if your connections are solid? Try this: give each plug a gentle pull after you lock it. If it stays put, you’re good to go.
You’ll find that a few simple upgrades keep your sound reliable night after night. Ready to lock in that perfect tone?
Audio‑Fidelity Maintenance Checklist for Long‑Term Reliability
Ever had a clean riff turn into a crackling mess because a loose plug slipped out mid‑song? It’s frustrating, but a quick check before each gig can keep that from happening. I start by measuring resistance at every speaker terminal with a digital multimeter, aiming for under 0.05 Ω; anything higher means oxidation or a bad crimp that will heat up and sag under bass peaks, making the amp clip.
Frankly, I run a weekly preventive inspection: tighten clamps, swap out any worn cables, and make sure each connector stays within its 5 A rating. This simple habit stops overheating before it can damage your gear.
Worth knowing: log any voltage drop you see. If a reading goes above 0.2 V under load, it’s a clear sign a joint is failing and needs attention.
Try this: clean all contacts with isopropyl alcohol, re‑crimp any loose connections, and double‑check polarity. A clean, solid connection means fewer surprise distortions and a longer life for your setup.
You’ll notice that a well‑maintained system stays reliable for years without the dreaded feedback or sudden loss of power.
Do you want to keep your sound tight and your equipment happy? Give these steps a try and see the difference on your next stage.
Frequently Asked Questions
Can I Use Any Multimeter Brand to Measure Speaker Resistance?
I tell you you can use any meter brand, but expect accuracy differences; cheap meters may read a few ohms off, while calibrated ones give precise speaker resistance for reliable diagnostics.
Do Balanced Cables Eliminate All Ground‑Loop Hum?
I tell you they don’t eliminate every hum; ground‑loop myths persist. Proper differential grounding helps, but you still need careful routing, shielding, and balanced interfaces to keep residual noise at bay.
Will a Slightly Loose Connector Cause Audible Distortion?
I’ll tell you straight: a slightly loose connector can absolutely cause audible distortion. Intermittent contact spikes resistance, and contact oxidation adds noise, turning clean music into crackling, uneven sound.
Is There a Recommended Torque for Tightening Speaker Terminals?
I recommend about 0.5 Nm torque for speaker terminals; it’s firm enough for solid contact without stripping threads. Consistent terminal maintenance—cleaning and tightening—keeps resistance low and prevents distortion.
Can Environmental Humidity Affect Connection‑Induced Distortion?
I’ve found that humid air speeds corrosion acceleration and causes insulation degradation, so I see more crackle and distortion when moisture see speaker terminals and cables. Keep them dry and sealed.