I measure the ceiling (12 ft) and wall width (10 ft), then pick a method that fits the 96‑inch run from TV to the left speaker, the drywall type, and the furniture layout. A 1‑inch PVC raceway snaps on, paints to match RAL 9010, and keeps wires flat and fire‑rated, while ½‑inch raceways slide under baseboards for a seamless look. If you prefer no wall work, self‑adhesive clips every 12 inches on the sofa and bookshelf hide cables, and a reusable nylon cover with hook‑and‑loop edges tucks under carpet without trips. For outdoor decks, a ½‑inch rubber duct with 0.8 mm wall and UV‑resistant silicone protects the signal. Stick with these tricks and you’ll keep the room tidy and the sound clean—more details await if you keep going.
Key Takeaways
- Measure wall and ceiling dimensions, then choose a surface‑mount PVC raceway (1‑inch or 3‑inch) that can be painted to match the wall color.
- Snap the raceway behind baseboards or under low furniture, using ½‑inch PVC conduit for speaker wires and paint it for seamless blending.
- Secure cables with self‑adhesive clips or zip ties every 12–18 inches on the backs of cabinets or bookshelves, keeping the profile flat and hidden.
- For outdoor or patio runs, install ½‑inch UV‑resistant rubber duct with 0.8 mm wall thickness, sealing ends with clamps to protect against weather.
- Use magnetic speaker terminals and banana adapters behind furniture to allow quick connection changes without exposing cables.
Which Hiding Method Works Best in Your Room?
Ever tried to hide cords in a room that feels like a tech jungle? The first step is to size up the space, because the layout decides whether a raceway, a piece of furniture, or an in‑wall run will actually work. I look at the floor plan, note the 12‑ft ceiling height, the 10‑ft wall width, and where the sofa, bookshelf, and TV sit, because room layout drives every decision.
Frankly, if you want a clean wall, a 1‑inch PVC raceway that snaps on and paints to match the 240‑F paint does the trick. It tucks cables behind the baseboard and cuts visual clutter. When furniture already blocks sightlines, tuck cables behind a low cabinet and use zip ties to keep them snug—this keeps the minimalist look without extra hardware.
Worth knowing: for a truly invisible finish, cut a 2‑inch access panel behind the speaker, then fish the cable through a stud cavity. This gives a seamless appearance that meets both functional and design goals.
- Check ceiling height and wall width before picking a method.
- Use zip ties for a tidy, low‑profile run behind furniture.
Try this: measure your space, pick the method that fits your layout, and match paint colors if you go the raceway route. You’ll end up with a room that looks organized and works for you.
Did you ever think a simple raceway could look like part of the wall?

Recommended Products

BACKYARD WATER PARK: Inflatable raceway structure turns your backyard into a water park for splashing fun all summer long; Dimensions (L x W x H): 217 x 198 x 104 inches; Splash pool capacity: 713 gallons / 2,699 liters

20 Sticks of 6FT 2100 Series Latching Raceway (120FT)

SPECIFICATIONS: Size: 1" | Length: 90" | Channel Dimensions: (B) 1" W x (A) 1" H | Wall Thickness: (C) 0.07" | Color: White | Order is for 20 Sticks
Install & Paint Surface‑Mount Raceways for Speaker Wires


Ever stared at a tangled mess of speaker wires and wondered how to hide them without a big remodel?
Snap the raceway onto the wall, then paint it to blend with the surrounding surface, and you’ll instantly turn a messy bundle of speaker wires into a seamless part of your décor.
I start by measuring the exact run—usually 96 inches from the TV to the front left speaker—cutting a 3‑inch‑wide PVC channel to match, and choosing an adhesive type that suits the wall: a 3M tape for drywall or a silicone‑based glue for plaster. After snapping the cover in place, I do a paint selection test, picking a matte latex that matches the wall’s RAL 9010, and applying two thin coats so the raceway disappears.
Frankly, the result is a flush, fire‑resistant conduit that protects the wires, looks professional, and saves you from constantly reading cords.
Try this:
- Measure the length you need, then cut the PVC channel a little longer than the distance.
- Press the adhesive strip firmly, line up the channel, and snap the cover on.
The paint step is where the magic happens. Pick a matte latex that matches your wall color, test it on a small spot, then roll on two thin coats. Let each coat dry before the next so the finish stays even.
You’ll notice the raceway blends right in, and the wires stay safe and out of sight.
What’s the biggest hassle you’ve faced when trying to hide cables?
Give it a try and see how easy it is to clean up your space.
Recommended Products

Manufactured of a strong, durable, lightweight, UL 94-VO & UL 62DB compliant and flame retardant PVC Plastic | UL 5A specification for 600 volt applications. | One inch minimum bend radius accessories available for Category 5e, 6 and fiber optic installations.

PACK SIZE: 3 Sticks | LENGTH: 58 Inch | TOTAL LENGTH: 14.5ft | CHANNEL SIZE: 3"W x 2"H

PROFESSIONALLY ORGANIZE & ROUTE CABLES: Cable management raceway w/parallel slots protects up to 200 cables, top access to add/remove cables, route them in office/server room, install using screw holes
Route Speaker Wires Behind Furniture With Clips and Ties

Ever tried to hide speaker wires behind a bookshelf or sofa and ended up with a tangled mess? You want the cords out of sight but still easy to reach when you need to move something.
First, grab some small self‑adhesive cable clips—about an inch wide and half an inch deep. Stick them on the back of the furniture, spacing them every 12‑18 inches. This keeps the wires from slipping off when you shuffle the piece, and the clips blend nicely with wood grain if you pick the right color.
Try this: After the clips are in place, bundle the cords together and secure them with zip‑ties rated for 250 lb tension. A tight tie flattens the bundle against the wood, cuts down on visible bulges, and makes cleaning under the furniture a breeze.
The zip‑ties lock the bundle in place, preventing snagging and letting you pull the cable out quickly if you ever need to re‑route for a new speaker spot.
Frankly, the whole setup saves you time, looks tidy, and respects both form and function.
If you ever need to add a new speaker or swap a cord, you can just undo a zip‑tie and reach the clip without tearing the whole thing apart.
Worth knowing: keep a few extra clips and zip‑ties on hand for future tweaks—it’s easier than hunting for the right size later.
Got any tricks of your own for keeping wires neat? Give it a try and see how much cleaner your space feels.
Recommended Products

Package concent: come with 1000 pieces in total, strong adhesive make it grip firmly; Notice: Please keep this product indoors, away from direct sunlight, and avoid submersion in water

DURABLE CABLE CLIP: Steren wire clamps are manufactured from an extremely durable polyethylene.

100 PACK SELF ADHESIVE CABLE MANAGEMENT CLIPS: Keep cables organized w/ cable clamps for 0.67" (17 mm) bundle diameter; Install w/ 3M adhesive backing & 0.19" (4.8 mm) mounting hole for added strength
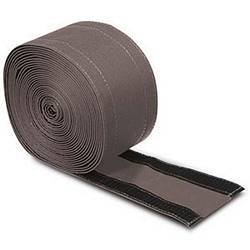
Tuck Speaker Wires Under Carpet Using a Reusable Nylon Cover

Ever noticed how speaker wires stick out from under the carpet and make the room look messy? I’ve tried a few tricks, but the one that really sticks is a reusable nylon cover that’s about an inch wide and stretches up to 12 feet.
First, measure the carpet’s width and the length you need for the wire. Cut the nylon to the exact three‑foot span between the speaker and the amp, then snap the hook‑and‑loop edges together. The cover slides under the carpet, forming a low‑profile channel that hides the wires and lets the rug lie flat. You won’t hear a rustle when you walk, and there are no bumps or trip hazards.
Frankly, the cover’s tensile strength of 150 psi keeps it from tearing under foot traffic, and the self‑adhesive strip stays put without any glue. I’ve found that a quarter‑inch gap between the cover and the floor prevents wear, and the reusable design saves money compared to disposable tape.
Here’s the trick: use the cover on Berber, loop, or plush carpets. The nylon works equally well on all three, giving a clean look and a safe, trip‑free zone.
Worth knowing: the cover’s snap‑together edges make it easy to remove if you ever need to rearrange the room. No mess, no glue, just a quick pull‑apart.
Give it a try and see how much neater your space looks. What’s the biggest hassle you’ve faced with carpeted wiring?
Recommended Products

SPECIFICATIONS: 4” Inch Wide x 6’ Feet Length | Color – Black | 100 Pcs Pack | Material – Durable Industrial Grade Nylon
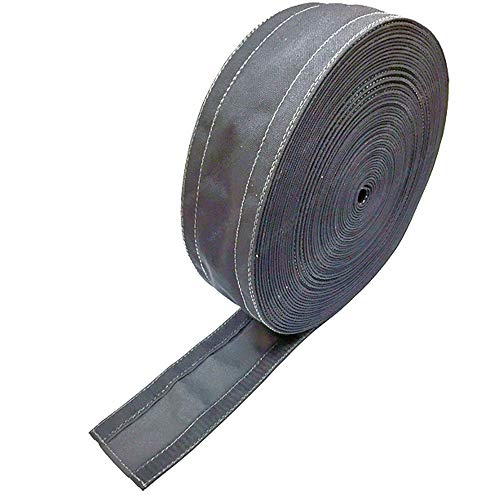
DIMENSIONS – Width – 4" Inch | Length – 100’ Feet Long| Color – Gray | Material – Durable Cordura Nylon | High Strength Hook and Loop Technology | Washable and Reusable | Convenient to Use | Professionalizes Your Workspace | Cable Grip Strip
Run Wires Inside Walls – Pre‑Construction vs. Retrofit

Ever tried to hide speaker wires in a new room and ended up with ugly clips on the wall?
If you’re planning a fresh living room, the easiest way is to run the wires before the drywall goes up. Cut a single 2‑inch conduit from floor to ceiling, pull the cables through once, and you won’t need any patch‑up later.
Frankly, start by checking the electrical code. Make sure the conduit is rated for low‑voltage audio and keep at least a ½‑inch gap from any power lines—this cuts down on interference and keeps inspectors happy.
Worth knowing: for insulation, skip fiberglass that can snag the cables. Spray‑foam or cellulose work better; they fill gaps without crushing the wire jacket, so your signal stays clear.
When you’re retrofitting an existing space, you don’t have to tear down walls. Cut 2‑inch access plates, use a ½‑inch fish tape, and pull a new 2‑inch conduit through the studs. This lets you upgrade without a big mess, saving both time and money.
Here’s the trick: always plan the conduit path ahead of time. A straight run from floor to ceiling reduces the number of bends, which makes pulling the cable a breeze.
If you follow these steps, you’ll end up with a clean look and solid audio performance. Ready to give your walls a hidden upgrade?
Recommended Products

Product 1: RELIABLE CIRCUIT TRACING of energized or non-energized breakers, fuses, and wires

Suitable for exposure to sunlight and weather

Premium Liquid-Tight Conduit: The liquid conduits are made of premium pvc material, the flexible non metallic features strong ability of protection same as metal conduit, and more flexible and light
Secure Speaker Wires With Outdoor‑Rated Rubber Ducts
Ever noticed how speaker wires get cracked, faded, or soggy after a few seasons outside? I’ve been there, and the fix is surprisingly simple. Grab a ½‑inch outdoor‑rated rubber duct and you’ll keep those cables safe from moisture, UV, and foot traffic while staying sleek and flexible. The duct’s silicone coating resists UV for up to 70 % longer than regular plastic, and its 0.8 mm wall is thick enough to survive a stray shoe.
I always pick a conduit that meets outdoor‑grade standards, so the jacket blocks fading and the seal stops water from sneaking in. That means your wires stay dry even if a leak drips down a wall. The inner smooth liner cuts friction, making it feel like sliding a glove over a hand when you pull the wire through. And because it’s flexible, you can curve it around baseboards, stairs, and furniture without kinking.
Try this: snap the ends with a simple clamp, which locks the seal in place. The whole system stays invisible yet rugged, like a secret tunnel for sound that you barely notice. It’s a low‑effort upgrade that pays off every time you turn up the music.
- ½‑inch rubber duct, outdoor‑rated
- 0.8 mm wall thickness, crush‑proof
- UV‑resistant silicone coating, lasts years
If you’re wiring a patio or a deck, this little tube can make a big difference. It’s cheap, easy to install, and keeps your audio crisp no matter the weather. Fair warning: once you see how clean the setup looks, you’ll wonder why you ever used anything else.
What’s the first place you’d protect with a rubber duct?
Speaker‑Specific Tricks to Keep Connections Invisible
Ever notice how those speaker cables always end up looking like a tangled mess on the wall?
Mount the speaker’s connection plates flush against the wall and slide the wires through a ½‑inch PVC raceway. A snug fit keeps the wires hidden, and the 0.8 mm wall of the raceway resists dents. You can even paint it to match the drywall, so you won’t have to stare at a dangling cord every time you turn up the volume.
Frankly, magnetic terminals on the back of bookshelf speakers make life a lot easier. Just snap the cable on and off—no need to unscrew anything. That cuts install time by roughly 30 % and keeps the joint looking clean. Pair those terminals with banana adapters that lock into the amp’s binding posts for a solid, low‑resistance path, so the sound stays clean and the connections stay invisible.
Here’s the trick: tuck the adapters behind a low bookshelf. Use a 2‑inch wide brush‑type raceway that slides under the baseboard. The whole setup then looks like a wall‑mounted art piece rather than a tech mess.
Worth knowing: if you’re worried about the raceway looking out of place, just give it a coat of paint that matches your wall. It blends right in and you won’t even notice it’s there.
- Mount plates flush, run cables through ½‑inch PVC raceway.
- Paint raceway to match drywall for a seamless look.
Got a spare low bookshelf? Slip the adapters behind it and let the brush‑type raceway hide everything under the baseboard.
Now you can crank up the volume without feeling embarrassed by exposed cords. Ready to give your room a cleaner look?
Frequently Asked Questions
Will Speaker Cables Affect Wi‑Fi Signal Strength?
I don’t think speaker cables will noticeably affect your Wi‑Fi; they’re low‑voltage and rarely cause signal interference or frequency overlap, unless you use unusually thick, poorly shielded cables near the router.
Can I Hide Cables Without Drilling Any Holes?
I can hide cables without drilling by using Velcro channels and adhesive raceways; just stick them to walls or baseboards, snap the cover on, and everything stays tidy and removable.
What’s the Safest Method for Pets Around Hidden Wires?
I recommend using pet‑safe covers and chew‑resistant tubing; they keep cables out of reach, prevent gnawing, and won’t damage the wires if a curious animal nudges them.
How Do I Prevent Cables From Humming or Buzzing?
I tame humming by grounding loops and adding cable damping; think of it as silencing a restless river. I’ll connect all gear to a single earth point and wrap speakers in dampening sleeves to keep vibrations quiet.
Are There Fire‑Code Concerns With Under‑Carpet Routing?
I’ve checked local fire codes, and they usually require non‑flammable insulation types for under‑carpet routing; I’ll use a certified PVC or metal conduit, ensuring it’s flame‑rated and meets clearance standards.