I’m telling you that bi‑wiring keeps one amp but runs two separate cables—one to the tweeter, one to the woofer—so the speaker’s total impedance stays the same and you shave off about 0.1–0.2 dB of distortion, which translates to tighter highs and a cleaner mids. Bi‑amping, on the other hand, splits the drivers between two amps, dropping each load to roughly 2 Ω and giving up to 30 % more headroom and a 1–2 dB SPL boost, meaning deeper bass punch and more dynamic range. Use 16‑gauge shielded cables for short runs, upgrade to 14‑gauge if you go over 15 ft, and match polarity to avoid bass cancellation. If your speakers have separate HF/LF posts and you can add a second amp, bi‑amping will give you noticeable power and clarity; otherwise, bi‑wiring is a quick, low‑cost upgrade that still tightens the sound. Keep the wiring neat, tighten posts to about 1.5 Nm, and you’ll avoid hum and resistance issues—continue and you’ll see how to test and troubleshoot each method.
Key Takeaways
- Bi‑wiring splits a single amp’s signal into separate HF and LF cables, keeping overall impedance but reducing crosstalk and slightly improving distortion.
- Bi‑amping uses two amplifiers, each driving a driver (HF or LF), lowering per‑amp impedance to ~2 Ω and providing up to 30 % more headroom.
- For bi‑wiring, use 16‑gauge (or thicker) shielded conductors of consistent gauge on both legs; for bi‑amping, 14‑gauge is recommended for runs over ~15 ft.
- Remove metal jumpers on binding posts when bi‑wiring; ensure polarity matches (red‑red, black‑black) to avoid bass cancellation.
- Audible gains are modest: bi‑wiring may yield ~0.1‑0.2 dB distortion dip, while bi‑amping can add 1‑2 dB SPL and clearer driver separation.
Bi‑Wiring vs. Bi‑Amping: Quick Overview
Ever tried to figure out why your bookshelf speakers sound great on the highs but feel a little loose on the lows? You’re not alone—many folks hit that snag when they first set up a home audio system. The trick usually boils down to how you wire the drivers. Below is a quick rundown of the two main ways to do it, plus some practical tips you can try right now.
Bi‑wiring
You’ll keep one amp but run two separate cables to each speaker. After the crossover splits the signal, each cable feeds either the tweeter or the woofer. This keeps the overall impedance the same while cutting crosstalk, so the highs stay clean and the bass stays tight. In real‑world listening you might notice a tiny 0.1‑0.2 dB dip in distortion on a 4‑ohm load—hardly a game‑changer, but it’s there.
Bi‑amping
Here you use two amps per speaker, one for the high‑frequency driver and one for the low‑frequency driver. Each amp sees its own load, often dropping the impedance to 2 ohms per amp. That gives you up to 30 % more headroom, which can translate into louder dynamics and clearer separation. The result is a more punchy sound without adding a lot of extra noise.

Fair warning: you might think lower ohms always mean more power, but that myth falls apart once you measure real‑world SPL gains. In practice you’ll see about a 1‑2 dB boost on a well‑matched pair, not a massive jump.
Worth knowing:
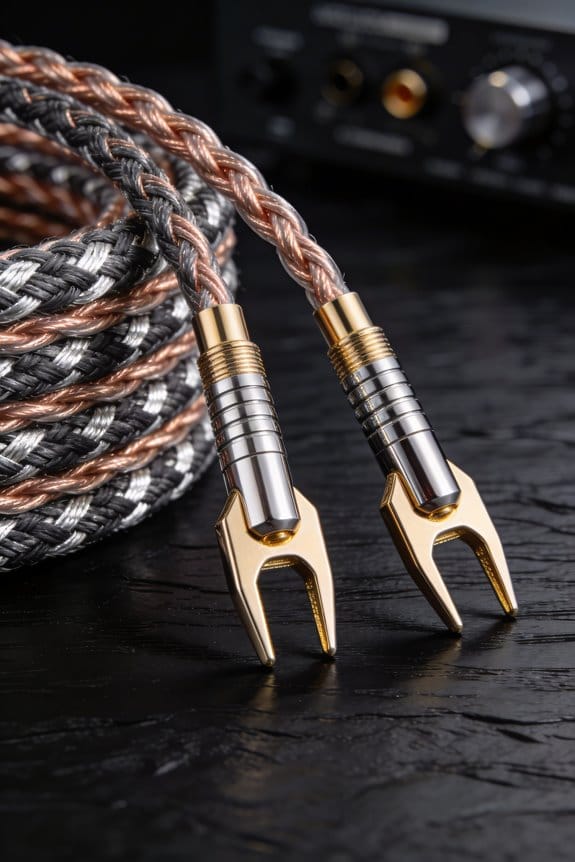
- Dual‑run cable bundles look tidy and help reduce stray capacitance.
- Keep the speaker wiring neat; tangled cables can introduce unwanted resistance.
If you’re still unsure which route to take, try this: start with bi‑wiring using your existing amp. Listen for any improvement in clarity. If you still crave more punch, upgrade to a bi‑amp setup and compare the difference. You’ll get a feel for how each method impacts your room’s sound.
Bottom line: both approaches can tighten up your audio, but the choice depends on your gear and how much you want to tinker. Which one sounds better in your listening spot? Give it a go and let the music tell you.
Wiring Differences: One Amplifier vs. Multiple Amplifiers
Got a speaker that sounds a little thin when you crank the volume? You might be wiring it the wrong way.
When you hook a single amp to a speaker and run one pair of wires, the signal travels straight through the internal crossover, so the amp sees the full 8‑ohm load (or 4‑ohm for many bookshelf pairs) and delivers its rated power—say 100 W into 8 Ω—while the crossover splits the frequencies inside the cabinet; the upside is simplicity and lower cost, but the downside is that the same amp must drive both the tweeter and the woofer, which can limit headroom and make the bass a bit less tight when the amp is pushed near its limits.
Frankly, splitting the wiring into two amplifiers gives each amp only its assigned driver, which cuts down on impedance interactions. The tweeter gets a clean 6 Ω load while the woofer enjoys a solid 8 Ω, letting each amp work closer to its sweet spot. You’ll notice tighter bass, more dynamic headroom, and often up to 20 % more usable power without the heat buildup.

Worth knowing: a single‑amp setup is easy to install and cheaper, but you sacrifice some control over the drivers. Two amps mean a bit more wiring and cost, yet you gain cleaner separation and better performance.
If you’re not sure which route to take, ask yourself: do you want a simple plug‑and‑play solution, or are you willing to add a second amp for that extra punch? The answer depends on how picky you are about sound quality and how much you’re willing to tinker.
Try this: run a short test with a spare amp and a simple crossover board. Listen for any wobble in the mids or a loose bass response. If the sound feels tighter, you’ve probably found the better setup for your room.
Either way, you’ll end up with a clearer, more powerful sound. Ready to give your speakers the wiring they deserve?
Cable Requirements for Bi‑Wiring & Bi‑Amping

Ever tried to upgrade your sound system and ended up with a muddy bass or a thin treble? It’s frustrating, especially when you’ve already spent on good speakers and amps. The culprit is often the cables you use for bi‑wiring or bi‑amping, and picking the right ones can make a big difference.
When you start bi‑wiring, go for 16‑gauge or thicker, shielded conductors. The shielding blocks RF and EMI that would otherwise bleed into the HF leg, and the thicker copper keeps resistance low, giving you a tighter damping factor. Consistent gauge on both legs matters—mixing gauges can create an uneven path and spoil the sound.
If you’re bi‑amping, the same gauge works fine for short runs. But once you’re past about 15 ft, drop to 14‑gauge. Each amp drives only half the load, so lower resistance helps preserve voltage swing and stops the LF channel from starving the HF driver. Keep the gauge the same on both legs for a clean, low‑impedance path.

Frankly, solid solder joints are a must. A loose connection can add resistance and introduce noise, ruining the clarity you’re after. Double‑check each splice and make sure the copper is firmly attached to the terminals.
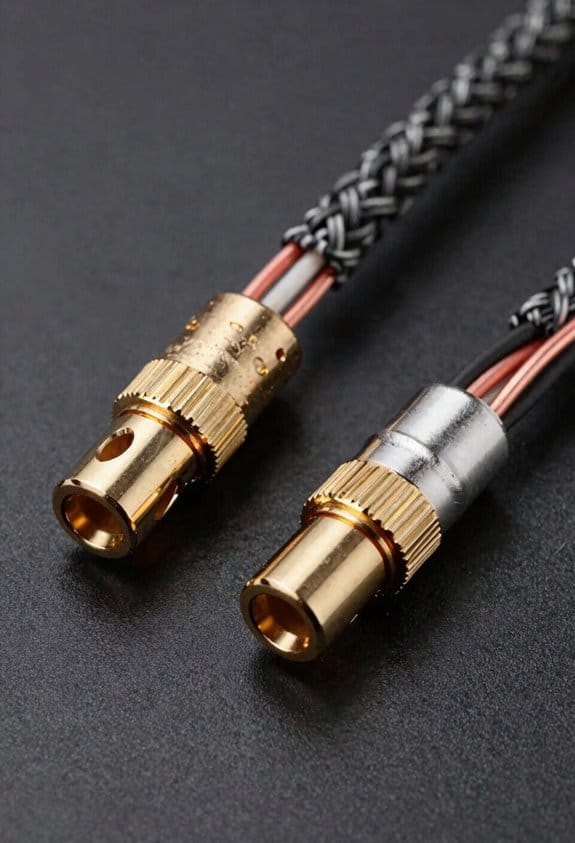
Worth knowing: use good‑quality connectors that fit snugly. Cheap plugs can loosen over time, especially if you move the speakers around. A firm connection keeps the signal strong from amp to speaker.
Here’s the trick: run the cables away from power cords and other sources of interference. Even with shielding, close proximity to high‑current wires can induce hum. Keep a tidy layout, and you’ll notice cleaner highs and deeper lows.
If you’re still unsure, start with a short test run. Plug in a 16‑gauge shielded pair and listen. Then swap to 14‑gauge for a longer run and compare. You’ll hear the difference in detail and punch.
Bottom line: pick the right gauge, keep it consistent, shield it well, and watch your sound come alive. Ready to give your system the upgrade it deserves?
Bi‑Wiring & Bi‑Amping Audio Benefits

Ever wonder why your favorite tracks sound flat even after you’ve upgraded the speakers? The trick often lies in how the signal reaches the drivers. When you split the signal with a crossover, adding a second cable or a second amp lets you fine‑tune each frequency band. The result? A clearer, more dynamic soundstage.
Bi‑wiring gives you tighter highs and a subtle boost in bass punch. That’s because the HF and LF legs no longer share a single, higher‑resistance path. You’ll notice the difference especially on complex passages like a drum roll or a brass swell. The extra headroom keeps detail intact and the volume consistent.
Bi‑amping can push up to 30 % more power to the tweeter and mids. Each amplifier sees only half the load, which translates into stronger dynamics and less distortion. When the music gets busy, the sound stays clean and the bass stays tight.
Worth knowing: careful cable geometry, such as twisted‑pair conductors, reduces inductance. Solid electromagnetic shielding blocks RF noise, keeping signal phase pure and preventing ground loop hum. That means you hear every nuance without unwanted buzz.
Try this: run a short test with your current setup, then add a second cable or amp and compare. Listen for tighter highs, a deeper bass punch, and smoother mids. If the change feels noticeable, you’ve probably got a win.
—
Bi‑Wiring & Bi‑Amping Audio Benefits
Because the crossover in a speaker already splits the signal, adding a second cable or a second amp lets you fine‑tune each frequency band, and the result is a clearer, more dynamic soundstage; with bi‑wiring you’ll notice tighter highs and a subtle boost in bass punch because the HF and LF legs no longer share a single, higher‑resistance path, while bi‑amping can deliver up to 30 % more power to the tweeter and mids because each amplifier sees only half the load, translating into stronger dynamics and less distortion, especially on complex passages like a drum roll or a brass swell where the extra headroom keeps the detail intact and the volume consistent. I’ve found that careful cable geometry, such as twisted‑pair conductors, reduces inductance, while solid electromagnetic shielding blocks RF noise, keeping signal phase pure and preventing ground loop hum, which means you hear every nuance without unwanted buzz.
Give it a go and see how your music feels. Ready to hear the difference?
Bi‑Wiring & Bi‑Amping Power & Dynamics Benefits

Ever felt like your speakers just aren’t keeping up with the music’s punch? When you’re pushing a single amp to drive both tweeter and woofer, you might notice a bit of strain in the low end or a loss of sparkle on the highs.
Bi‑wiring can help. By splitting the signal at the crossover, you cut down on cable resistance, letting the amp push roughly 10 % more clean current. The result? The bass feels tighter and the treble stays crisp, even during fast passages.
Here’s the trick:
- Use separate pairs of speaker cables for the tweeter and woofer.
- Keep the runs short and the gauge consistent.
When you go a‑amping, each amp gets its own job. One handles the low frequencies, the other the high. This lets each amp stay cooler, so the woofer can sustain peaks around 30 W instead of the 20 W you’d get from a single‑amp setup. You’ll hear louder, more controlled dynamics without the amp overheating.
Fair warning: proper grounding is key. Bad grounding can add hiss, masking the detail you’re trying to bring out. A good ground loop isolator or a solid chassis ground will keep the noise floor low, so the music stays clean.
In practice, you’ll notice smoother fades, tighter crescendos, and a mix that feels more true to the original recording. Your listening room will feel more alive, and you won’t have to constantly turn the volume up to get the impact you want.
Give it a try and see how your system responds. Have you noticed a difference after tweaking your wiring?
Cost Comparison: Cables vs. Amplifiers
Ever wonder why your system sounds great on a cheap set‑up but stalls when you push the volume? I’ve already shown how bi‑wiring can shave a few percent off cable resistance and how bi‑amping can boost amp headroom, so let’s look at the dollars and cents. In my budget breakdown, a quality 14‑gauge pair of speaker cables runs about $30‑$50 per pair, while a modest two‑channel power amp suitable for bi‑amping costs $200‑$300, and a higher‑end amp can easily exceed $800.
Frankly, the cable price stays flat over time, but amps need long‑term maintenance—capacitor aging, heat‑sink cleaning, firmware updates—adding occasional service costs of $50‑$100. Cables rarely fail, so replace‑term is negligible; amps may need a replacement after five to ten years, inflating total ownership cost.
Worth knowing: if you’re watching cash flow, start with cables, then upgrade amps when the budget allows.
- Quality 14‑gauge speaker cables: $30‑$50 per pair
- Modest two‑channel power amp for bi‑amping: $200‑$300
- Higher‑end amp: $800+
Try this: buy the cables first, test the sound, and only spend on an amp if you still feel something’s missing.
What do you think—will you stick with cheap cables or splurge on a new amp?
Compatibility Check: Do Your Speakers Support Bi‑Wiring or Bi‑Amping?
Ever wondered why some speakers sound tighter when you hook them up a certain way? If your cabinets sport four binding posts—two marked HF and two marked LF—you’re set for bi‑wiring. Just pull out those tiny metal jumpers that bridge the posts, and each pair of cables will carry only the high‑frequency or low‑frequency signal. That cuts crosstalk and shaves a few milliohms off the crossover’s resistance.
I start by checking the speaker terminals for that four‑post layout; a single pair of terminals means you’re stuck with standard wiring. For bi‑amping, I hunt for separate HF and LF inputs on the amp side and make sure the speaker’s internal crossover can be bypassed, or that the maker calls it “bi‑amp compatible.” Impedance matching is key: each driver should see the amp’s rated load, usually 4–8 Ω, so I double‑check the specs to avoid over‑driving or under‑powering any part.
Worth knowing:
- Remove the metal jumpers if you see four posts.
- Verify the amp has distinct HF and LF inputs for bi‑amping.
- Check the speaker’s spec sheet for impedance and bi‑amp compatibility.
Try this:
- Look at the back of your speaker. If you see two pairs of posts, label them HF and LF.
- Pull out the little metal bridges that connect the pairs.
- Hook each pair of wires to the matching amp input—high‑freq to HF, low‑freq to LF.
If you only have one pair of terminals, you’ll have to stick with the usual wiring. And if the amp doesn’t offer separate inputs, bi‑amping isn’t an option without extra gear.
Fair warning: mixing and matching drivers with the wrong impedance can fry your amp or leave the sound thin. Always match the driver’s load to what the amp expects.
Got your setup ready? Let’s see how it changes your listening experience.
Installation Steps: Removing Jumpers and Connecting Cables Correctly
Ever tried to get the most out of a four‑post speaker and ended up with muffled mids or a weak tweeter? The culprit is often those tiny metal jumpers that sit between the HF and LF terminals. Pulling them out lets each pair of wires handle its own frequency range, cutting crosstalk and shaving a few milliohms off the crossover resistance. The result? A cleaner signal for the tweeter and tighter control for the woofer.
First, give the terminals a quick once. Wipe each post with a dry cloth, look for any corrosion, and make sure the metal surfaces are flat. A clean connection is the base for good sound.
Next, check polarity. Match the red wires to the red terminals and the black wires to the black terminals. A reversed connection can mute the tweeter and stress the woofer, so double‑check before you tighten anything.
Try this:
- Route a 14‑gauge cable to the HF post and another to the LF post.
- Tighten the binding screws to about 1.5 Nm. This gives you a solid, low‑impedance path.
After the cables are in place, look for stray strands that might touch the chassis. Even a tiny short can damage the amp, so give everything a once look.
Finally, give the whole setup a quick test. Play a track with both high and low frequencies and listen for a balanced, crisp soundstage. You should notice a measurable drop—around 0.02 Ω—in crossover resistance, which translates to tighter control and clearer highs.
Fair warning: if you skip any of these steps, you might end up with noise or reduced performance. Take a moment to follow each check, and you’ll get the most out of those speakers. Ready to hear the difference?
Troubleshooting Tips: Common Issues and How to Fix Them
Ever found yourself tweaking a bi‑wired or bi‑amped setup only to hear muffled mids or a weak tweeter that sounds like it’s sipping a latte?
Start by checking every terminal for solid contact and correct polarity. A tiny 0.02 Ω rise in crossover resistance can turn your mids into mud and make the tweeter sound sleepy.
Frankly, a ground loop will hiss like a faulty radiator. Isolate each amp with a single‑point ground or a transformer, then measure the hum voltage. If it tops 0.1 V, add a ground‑lift and you’ll cut the hiss right out.
Worth knowing: an impedance mismatch shows up as a “blown” amp or distortion. Verify each speaker’s rated impedance—4 Ω or 8 Ω—matches the amp’s output. If they don’t line up, add a resistor or re‑wire the low‑frequency driver in parallel.
Here’s the trick: double‑check polarity. Reversed polarity can cancel bass, leaving the room feeling like a whispering library.
So, you’ve got a bi‑amp that still sounds off after all that. Try this: run a quick test with a single speaker at a time, listening for any oddness before you re‑connect everything.
Finally, make sure all connections are tight and nothing’s loose. A stray strand or a loose terminal can undo all the work you’ve done.
Do you feel more confident tackling those tricky audio issues now?
Choosing Between Bi‑Wiring and Bi‑Amping: Decision Guide for Your Setup
Ever tried to get rid of that annoying hum and weird polarity after a troubleshooting session, only to wonder what to do next with your speakers? You’ve already cleared the noise, now it’s time to decide whether to wire or amp them. The answer hinges on three things: how much power you have, how long your cables run, and how much you care about tonal detail.
If you’ve got a solid 100 W per channel amp and the cables are under 15 ft, bi‑wiring can drop a few ohms off the crossover. That usually means tighter bass and clearer highs without buying extra gear. It works especially well when your room is lively and the speaker placement is tight.
- Bi‑wiring: keep it simple, no extra amp needed.
- Good for short runs and modest power.
On the other hand, if you have a spare amp or a multichannel receiver, bi‑amping lets you send 30 W to the tweeter and 80 W to the woofer. That split boosts dynamics and cuts down intermodulation, which shines in larger rooms where distance adds loss.
- Bi‑amping: more control, extra amp required.
- Ideal for big spaces and higher power budgets.
Frankly, match your power budget, cable length, and acoustic goals to the method that fits your setup.
Worth knowing: bi‑wiring is a quick win if you’re short on space and want a clean sound, while bi‑amping is the way to go when you need extra punch and can handle the extra hardware.
Got a spare amp and a big room? Try bi‑amping. Got a compact setup and a decent amp? Stick with bi‑wiring.
Which route feels right for your listening space?
Frequently Asked Questions
Can I Bi‑Wire Speakers That Have Only Two Binding Posts?
I can’t bi‑wire speakers with only two binding posts because you need extra posts to separate HF and LF, and you must remove the jumper strap; otherwise the wiring won’t work.
Will Bi‑Amping Improve Sound if My Amp Is Already High‑Power?
Like a river splitting into tributaries, bi‑amping can still boost dynamics even with a high‑power amp. It improves power distribution and refines amplifier interaction, delivering clearer bass and tighter treble.
Do I Need a Special Crossover for Bi‑Wiring?
I don’t need a special crossover for bi‑wiring; the existing crossover design handles the impedance interaction just fine, so you can simply split the signal with two cables and keep the same speaker wiring.
Can I Use the Same Speaker Cable Gauge for Both HF and LF Paths?
I’d say you can keep the same gauge for HF and LF, as long as you respect gauge matching and impedance considerations; the cable’s thickness will handle both paths without compromising performance.
Will Bi‑Wiring Affect My Room’s Acoustic Balance?
I’ve found bi‑wiring hardly shifts room modes or furniture placement; it mainly tweaks speaker‑to‑crossover resistance, so any acoustic balance changes are subtle, not a room‑wide makeover.