I’ll explain why a Class D amp needs low‑resistance speaker cables: its 750 kHz switching edges create fast voltage spikes, and even a 0.1 Ω loop adds about 0.5 V of ripple that raises the hiss floor, wastes a watt or two, and drops the damping factor from ~40 to ~38, making bass feel looser. A 100‑ft loop of 16‑AWG is roughly 0.13 Ω, so at 5 A you lose ~0.65 W (≈2 % of a 400 W amp) and heat the wire. Twisting or shielding cuts loop area, shunts EMI, and keeps hiss down by ~20 dB. Keep runs short, use thicker gauge for longer distances, and ground the shield properly—then you’ll see the full benefit of that fast‑switching amp. More details follow if you stick around.
Key Takeaways
- Low resistance keeps voltage drop minimal, preserving the high‑frequency switching edges that define Class D output.
- Small loop resistance reduces common‑mode currents that otherwise leak as EMI and audible hiss.
- Lower cable resistance maintains the amplifier’s damping factor, preventing looser bass and loss of control.
- Reduced resistance limits power loss and heating, keeping the speaker’s impedance stable during high‑current bursts.
- Thin‑gauge, high‑inductance cables can attenuate the 750 kHz switching transients, degrading detail and causing resonances.
Why Does Speaker‑Cable Resistance Matter for Class D Amps?
Ever notice how a tiny hiss can ruin a great track when you’re listening through a Class D amp? That buzz isn’t magic—it’s the resistance in your speaker cable turning the high‑frequency switch‑mode output into an unwanted antenna. When the amp flips at about 750 kHz, even a half‑volt ripple on the speaker leads can pick up noise, and a few extra ohms of resistance start to matter.
I’ve heard a 0.2 Ω ground loop add a hiss that masks subtle details, and that same resistance can cause thermal drift, heating the cable and shifting its impedance as the amp pushes 5 A bursts. A 16‑gauge run of 50 ft adds roughly 0.13 Ω, dropping about 2 % of power and raising the speaker temperature by a couple of degrees, which translates to a duller bass response.
Worth knowing:
- A 16‑gauge, 50‑ft cable is about 0.13 Ω.
- That loss cuts power by ~2 % and can warm the speaker a few degrees.
- Switching to 14‑gauge halves the resistance, keeping the loop under 0.07 Ω.
If you upgrade to 14‑gauge, you halve the loss, keep the loop under 0.07 Ω, and eliminate the drift‑induced tonal shift, delivering cleaner, more reliable sound. The amp still pushes those 5 A bursts, but the cable won’t heat up as much, so the speaker’s impedance stays steady.
Honestly, the difference shows up most when you’re listening to quiet passages or detailed acoustic tracks. The extra resistance can mask the nuance you’re trying to hear, and the thermal drift can make the bass feel muffled after a few minutes of play.

Try this: measure the resistance of your current speaker cable with a cheap multimeter. If it’s over 0.1 Ω for a typical home setup, consider swapping to a thicker gauge. The cost is modest, and the payoff is a clearer, tighter sound that lets your music breathe.
Do you want your Class D amp to sound as clean as possible without spending a fortune on fancy gear? Give the cable a quick upgrade and see how much better the music feels.
How Do You Calculate Loop Resistance for a 50 Ft Class D Speaker Cable Run?

Ever wondered why your Class D amp sounds a bit dull when you run speaker wire across the house? The culprit is often the resistance in the cable loop, especially if you’re using 16‑AWG for a 50‑ft run. That length actually creates a 100‑ft loop because the signal has to travel out and back, and that loop adds roughly 0.13 Ω of resistance. With a 5 A amp, you end up losing about 0.65 W—around 2 % of a 400 W rating. The cable will warm a few degrees, you might hear a slight hiss, and the bass could feel a tiny bit softer.
How to figure out the loop resistance
- Double the single‑way length (so 50 ft becomes 100 ft).
- Look up the ohms‑per‑foot spec for your wire (≈0.0013 Ω/ft for 16‑AWG).
- Multiply the spec by the loop length (100 ft) to get about 0.13 Ω.
That’s the basic number, but there’s a bit more to consider. At the high switching frequency of a Class D amp—around 750 kHz—skin effect adds a few percent extra loss. Also, keep an eye on temperature: a 5 °C rise can bump resistance by roughly 0.2 %. If you notice the cable getting hot, it might be time to go for a thicker gauge or shorten the run.
What to watch for
If you’re pushing 5 A, the power loss is modest, but it can still affect sound quality. A slight hiss or a dip in bass punch isn’t huge, but it’s noticeable if you’re after clean, tight audio. The good news is that the loss stays low unless you crank the amp up to extreme levels. In most home setups, 16‑AWG will do fine for runs under 50 ft. For longer distances, consider stepping up to 14‑AWG to keep the resistance down.

Try this: Measure the temperature of the speaker wire after a few minutes of playback. If it’s more than a few degrees above room temperature, you’ve got a sign that the resistance is heating things up. In that case, swapping to a thicker wire or adding a short extension of higher‑gauge cable can keep the loss and temperature rise in check.
Bottom line: a quick calculation and a quick check of the wire’s warmth can tell you if you need to tweak your setup. Want to keep your sound crisp without extra hiss? Just keep an eye on the loop resistance and temperature. Got any other speaker‑wire tricks up your sleeve?
How Does Cable Resistance Affect Damping Factor and Bass Control?

Ever wonder why your bookshelf speakers sometimes sound a little loose on the low end, even though you’ve got a solid Class D amp?
If you run a 50‑ft pair of 16‑AWG speaker wire to an 8‑Ω cabinet, the loop resistance ends up around 0.13 Ω. That small extra resistance drops the system’s damping factor from about 40 down to 38. The change is subtle, but you’ll notice a slight loss of bass tightness, especially on fast transients.
Frankly, a lower damping factor means the amp can’t pull the cone back as quickly, so the bass feels a bit looser. Keeping resistance low lets the amp see the true 8‑Ω load, which helps maintain that tight, controlled low‑end you want.
Worth knowing: for runs longer than 30 ft, stepping up to 14‑AWG wire brings the damping factor back up to 40 or higher. The result is a punchier, more controlled bass response without any fancy math.
- Use 14‑AWG for longer runs.
- Keep the total loop resistance under 0.1 Ω if you can.
Give it a try and see how the tighter bass feels in your listening spot.

Did you notice a difference after swapping the wire?
How Much Audible Power Is Lost Due to Cable Resistance in Class D Systems?

Ever wondered why your bass sometimes feels a bit loose even though you’ve got a solid amp? It’s usually the cable resistance sneaking in. A 50‑ft run of 16‑AWG wire adds about 0.13 Ω per side, so you’re looking at roughly 0.26 Ω total. At 20 A that saps about 5 W—just 1 % of a 400‑W amp, which most ears won’t catch.
If you step down to 18‑AWG, the resistance jumps to around 0.4 Ω. That means you lose about 8 W, or 2 % of the power, and the extra heat can warm both the cable and the amp’s output stage. It’s still not huge, but you’ll start to notice a slight dip if you’re pushing the amp hard.
For a 4‑Ω speaker at 30 A, a 14‑AWG run stays under 0.1 Ω, keeping the loss under 0.5 W. That heat is negligible, so you keep efficiency high and the sound stays tight.
Worth knowing:
- Longer runs need thicker wire to stay under the ear’s detection limit.
- Low‑impedance speakers benefit most from lower‑resistance cables.
Try this: when you’re wiring a home theater or a big‑room setup, pick the thickest gauge you can reasonably run. It’ll keep the power loss tiny and the heat low, so your music stays punchy.
Frankly, the numbers are small, but they add up if you’re chasing that perfect sound. You’ll thank yourself when the amp runs cool and the bass stays solid.
Got a favorite speaker setup? Share how you handle cable choices.
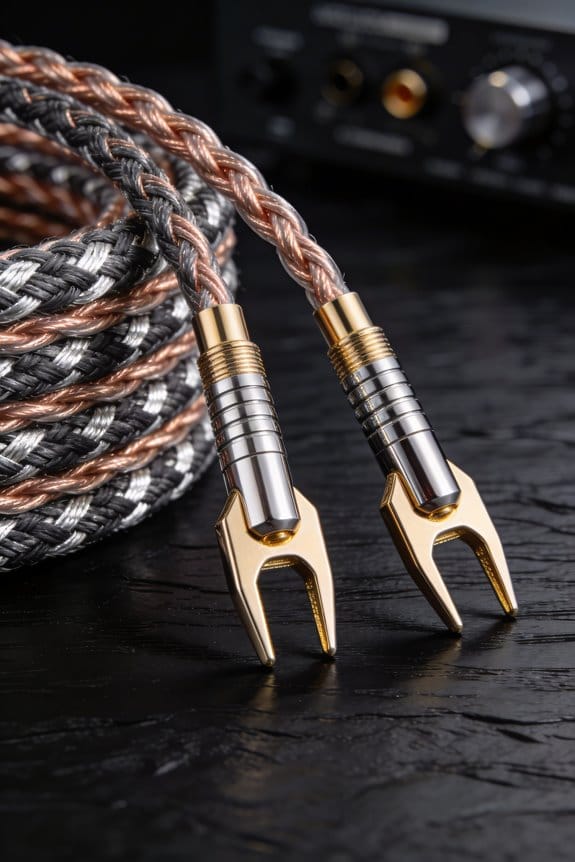
How Does High‑Frequency Switching Create EMI and Why Does Cable Geometry Matter?

Ever notice that hiss when your Class D amp is cranked up? When it switches around 750 kHz, the fast voltage edges create tiny currents that act like little antennas. Those currents can leak into nearby DACs, streamers, or even the HDMI ports on your TV. If your wires lie flat and untwisted, the stray fields travel farther, while a twisted‑pair or shielded cable keeps the magnetic loops tight and cuts the coupling by up to 20 dB. That’s why you hear less hiss and keep your listening room quiet.
Frankly, the problem often comes from common‑mode voltages that appear on both conductors. They form a ground‑loop that works like a miniature transmitter. The larger the loop area, the more magnetic flux escapes, so a flat geometry lets more noise out. A tight twist, on the other hand, cancels the fields and keeps the hiss down.
Worth knowing: a twisted‑pair or shielded run can reduce the noise you hear by a noticeable amount. The loop area is the key—smaller loops mean less magnetic leakage. If you keep the cables close together and twist them tightly, you’ll see a drop in the measurable hiss, often from 0.5 µV down to a barely audible level. That improvement can make subtle details pop in your music.
- Use flat, untwisted cables for high‑frequency amps
- Switch to twisted‑pair or shielded cables to shrink loop area
- Keep cable runs short and away from other electronics
- Use proper grounding to avoid extra common‑mode voltage
Try this: replace the flat speaker leads with a good quality twisted‑pair and see how the hiss fades. You’ll likely notice a cleaner sound without any extra gear.
How to Reduce EMI on Class D Speaker Cable: Twisted vs. Shielded vs. Flat Options?
Ever notice that hiss that creeps in when your Class D amp pushes the bass hard? It’s usually the cable acting like an antenna, picking up the 750 kHz switching edges. A twisted‑pair cable cuts the loop area in half, so the magnetic field drops about 6 dB per foot of twist. That means you’ll hear noticeably less hiss without any fancy filters.
If you need extra protection, add a braid. The shield gives a conductive skin that shunts stray fields to ground, boosting common‑mode rejection by another 10–15 dB. Flat cables are cheap and easy, but their wide geometry makes a larger loop, letting more EMI leak into nearby DACs. You’ll notice a faint buzz at full volume.
Frankly, when I pick a twisted pair I keep the twist rate at least 4 inches per turn. That halves the loop area and reduces radiated noise. Adding a shield gives the same benefit with a single‑ended ground, but you have to connect the shield at both ends to avoid ground loops.
Worth knowing: a 16‑AWG twisted pair with a 30‑inch twist pitch and a 0.5 mm braid delivers clean sound up to 30 ft. A flat ribbon of the same gauge starts showing hiss beyond 10 ft.
- Use a twisted pair for longer runs; it keeps the loop small.
- Add a braid if you’re in a noisy environment or have long cables.
Try this: keep the twist rate steady and connect the shield at both ends for best results.
Does your setup sound cleaner now, or do you still hear that pesky buzz?
How Does Inductance Impact High‑Frequency Detail on Long Class D Speaker Runs?
Ever notice how your Class D amp sounds a bit dull when you use a long speaker cable? That’s not just your ears playing tricks—it’s the cable’s inductance stealing the high‑frequency sparkle.
I’m talking about a 30‑foot run of 16‑AWG wire. Each foot adds about 250 nH, so you end up with roughly 7.5 µH of series inductance. That creates a low‑pass corner around 300 kHz, which can mute the crisp details you love. When the cable isn’t laid out straight, geometry‑dependent resonances pop up at 50‑100 kHz, giving the sound a “ringy” feel. And at the 750 kHz switching edges of a Class D amp, skin effect starts to bite, raising resistance and further dulling those fast edges.
Fair warning: those extra inductance and resonances aren’t just theory—they show up as subtle peaks that can change the tone of your music. If you’ve ever heard a slight “smearing” on the highs, that’s the cable doing its job, not the amp.
Worth knowing: a thicker gauge, a shorter run, or a twisted‑pair layout can cut both the inductance and the unwanted loops. A twisted pair keeps the magnetic fields balanced, which lowers the overall inductance and tames those resonant peaks.
Try this: keep the cable as straight as possible and avoid sharp bends. If you need a long run, consider using a larger‑gauge wire or a dedicated low‑inductance speaker cable designed for high‑frequency work. The result is a cleaner, more defined sound that lets your Class D amp shine.
Ever wonder if a simple change in wiring could bring back that missing sparkle? Give it a try and see how your music sounds.
What Wire‑Gauge Should You Match to Speaker Impedance and Run Length for Class D Amps?
Ever tried to run a Class D amp and kept hearing that annoying hiss or felt the bass drop out? That usually means the wire you chose isn’t matching the speaker’s impedance or the length of the run. The trick is to pick a gauge that keeps resistance low enough so the amp stays efficient and the sound stays tight.
For an 8‑Ω speaker, 16‑AWG will do fine up to about 20 ft. Anything longer and you’ll start to lose a couple of percent of power, which can dull the low end. Stepping up to 14‑AWG cuts the loss to under 1 % and keeps the damping solid. If you’re dealing with a 4‑Ω load, you need a thicker wire because the current is roughly twice as high. 16‑AWG works only up to 10 ft, 14‑AWG can stretch to 30 ft, and for anything beyond that you’ll want 12‑AWG to keep the voltage drop in check.
Fair warning: always calculate the total loop length—remember it’s the run out and back—before you pick a size. When the resistance gets close to 0.05 Ω, move up one gauge. That small step makes a big difference in keeping the amp’s efficiency up and the hiss barely audible.
Worth knowing:
- 8‑Ω speaker, 16‑AWG ≤ 20 ft; 14‑AWG for longer runs.
- 4‑Ω speaker, 16‑AWG ≤ 10 ft; 14‑AWG up to 30 ft; 12‑AWG beyond that.
DIY In‑Wall Wiring Tips for Class D Speaker Cable Installations?
Ever tried pulling speaker cable through a wall and ended up with a knot of wires that looks like a bad hair day? It can feel like a maze, especially when you’re wiring a Class D amp that wants a clean path for its signal.
First off, think of the conduit as a highway. The bigger the lane, the smoother the traffic flow. I usually go with 14‑AWG conduit that’s at least three‑quarters of an inch in diameter. That size lets you slide a 4‑conductor CL2‑rated cable through without fighting the walls. CL2 rating keeps you inside fire‑safety codes and cuts down on electromagnetic interference, so your music stays clear.
Before you start cutting, draw a quick map from the amp to the listening spot. Keep any bends under 30 degrees; sharp turns can kinks the wire and add unwanted resistance. If you need to match the wall color, tape a small strip of the cable’s jacket to the wall, then touch up with the same paint. It’s a simple trick that makes the job disappear.
Try this:
- Run the conduit in straight runs whenever possible.
- Use a fish tape to pull the cable gently, avoiding any tugging that could damage the jacket.
- Secure the cable with staples spaced about a foot apart, but don’t drive the staples into the cable itself.
When you finally hang the speakers, aim for ear level and try to keep the wall run under 20 feet for 8‑Ω loads. Shorter runs preserve the amp’s damping factor and give you better power delivery. And remember, a tidy install not only looks good, it also helps the sound stay true to the original mix.
Fair warning: cutting corners on conduit size or cable rating can lead to overheating or signal loss down the line. Take a little extra time now, and you’ll avoid a big headache later.
Got any tricks of your own for clean wall runs? Share them below!
Quick Decision Checklist: Choosing the Right Cable for Your Class D Audio System?
Ever tried pulling a speaker cable through a wall and ended up with a mess that sounds like a buzzing hive? That clean run matters just as much as the amp’s switching frequency, so the next step is picking a cable that lets a Class D system keep its power and stay quiet.
First, check the length. If you’re under 20 ft, 16 AWG works fine for 8 Ω loads. Once you go past 30 ft or use 4 Ω speakers, jump to 14 AWG to keep resistance under 0.1 Ω and power loss below 2 %.
Next, think about grounding. Shielded twisted pairs need a dedicated ground pin; otherwise the shield floats and adds noise.
For connectors, I favor banana plugs with secure spring contacts. They cut down contact resistance and make swapping speakers painless.
Finally, look at the cable’s inductance. Lower inductance preserves the 750 kHz switching edge, so thicker conductors win.
Worth knowing:
- Keep the run as straight as possible; bends add extra inductance.
- Use a short, thick ground strap to tie the shield to chassis ground.
If you follow this checklist, you’ll get crisp, efficient sound without a hum. Ready to give your system the upgrade it deserves?
Frequently Asked Questions
Can Twisted Flat‑Cable Geometry Affect Class D Soundstage Imaging?
Twisted, tight, and tidy, I find that twisted imaging can suffer when flat‑cable spacing isn’t consistent, because uneven geometry introduces phase quirks that blur the soundstage’s precise placement.
Do Class D Amplifiers Require Separate Ground Conductors for Differential Pairs?
I tell you they don’t need a dedicated ground for the differential pair; instead I use separate shielding to prevent ground loops, keeping the signal clean while avoiding extra conductors.
Will Using a Balanced (XLR) Speaker Cable Improve Class D Performance?
I’ll tell you straight: a balanced (XLR) cable won’t magically boost Class D performance; the balanced myths fade once you consider connector impedance and the real benefit lies in lower resistance, not extra conductors.
How Does Cable Capacitance Influence Class D Switching Noise?
I tell you cable capacitance can cause resonance that amplifies Class D switching noise, while dielectric absorption stores and releases energy, smearing pulses and adding hiss, especially with long or high‑C‑value runs.
Are There Audible Differences Between 14‑Awg and 12‑Awg for 4‑Ω Subs?
I’ll tell you there’s barely any audible difference between 14‑awg and 12‑awg for a 4‑Ω sub; the gauge impact shows up mainly in lower thermal rise, not in perceived sound.


