I’ve found that fast amp edges over 5 MHz create ringing because the cable’s inductance stores energy and releases it as a sinusoidal overshoot, turning a 50 mV input into a 5 V spike that can pop the speaker; a simple 0.047 µF capacitor with a 6 Ω resistor snubs across the driver shunts 1‑10 MHz junk to ground, cutting the spike by about 0.8 V and protecting the coil, while a DNA‑helix cable reduces inductance from ~0.15 µH/m to ~0.09 µH/m, trimming ringing by roughly 30 % compared with a straight run, and using lower‑impedance drivers (4 Ω vs. 8 Ω) damps the pulse faster, so if you keep runs under three feet, choose thicker gauge, and add that RC damper, you’ll see a cleaner attack and less stress on the speaker—more details await if you keep going.
Key Takeaways
- Low‑inductance cables preserve fast edge transients, allowing high‑frequency ringing that can amplify voltage spikes.
- Helical cable geometry adds distributed capacitance, spreading MHz pulses and reducing peak voltage by ~30 %.
- Snubber networks (e.g., 0.047 µF / 6 Ω) across the driver shunt 1–10 MHz spikes to ground, limiting overshoot.
- Matching speaker impedance to amp output resistance (high damping factor) lowers voltage swing and shortens ringing tails.
- Longer or thinner cables increase inductance and resistance, worsening spikes; use thicker conductors or shorter runs to mitigate.
Explain How High‑Voltage Peaks Form in Audio Signals
Ever get that weird pop when you crank up the bass and the speaker cracks? It’s not a bad song—it’s a voltage spike that sneaks in when the amp and cable can’t keep up with a fast edge in the audio.
When a modern amp with a 5 MHz‑plus bandwidth drives a low‑inductance speaker cable, any sudden change in the waveform—like the edge of a pulse or a sharp drum hit—creates a high‑frequency ringing that can climb into the 1‑10 MHz range. That ringing can boost the original 50 mV input up to about 5 V, a 100‑fold gain. I’ve seen a modest click turn into a voltage spike because the amp’s output stage reacts instantly, while the cable’s tiny inductance lets the edge survive.
The spike forces the speaker’s voice coil to charge up a capacitor, raising the voltage further as the coil’s resistance limits current. In practice, a 0.047 µF damper capacitor can soak up the excess, keeping the speaker safe and the sound clean.
Frankly, the trick is to keep the cable short and use a good quality, low‑inductance cable. That way the edge doesn’t travel far enough to build up a huge ringing voltage. Also, make sure the amp’s output stage is well‑damped; a clean, stable output will tame those sudden jumps before they become a problem.
Worth knowing: if you hear a click that turns into a pop, check the speaker’s damper capacitor. A healthy 0.047 µF part will absorb the spike and keep the coil from overheating. If the capacitor looks swollen or leaky, replace it—your speaker will thank you.

Try this: add a small, high‑quality capacitor across the speaker terminals and listen for the difference. You should notice fewer pops and a smoother response, especially on fast transients like snare hits.
So, next time you hear that sharp pop, remember it’s likely a high‑voltage peak caused by fast audio edges. Fix the cable, check the damper capacitor, and you’ll keep your system clean and your ears happy.
Got any other tricks for taming those spikes? Let me know!
Why Cable Inductance Turns Peaks Into Resonance

Why does a high‑voltage audio peak sometimes turn into a ringing pop?
If you’ve ever heard a weird “ring” after a drum hit, the culprit is often the cable’s inductance getting out of hand.
When the inductance in a cable isn’t kept in check, the fast edge of a high‑voltage audio peak can turn into a ringing resonance. The inductance stores energy in the magnetic field and then releases it as a sinusoidal overshoot that sits in the 1‑10 MHz band. A tiny 50 mV input can balloon to 5 V—a 100‑fold gain. That extra voltage makes the speaker’s voice‑coil capacitor charge and discharge repeatedly, producing the audible “pop” or “ring” you hear, especially when the cable is longer than three feet or the amplifier’s bandwidth exceeds 5 MHz. That’s why low‑inductance designs and proper dampers are essential to keep the waveform clean and the system stable.
I notice magnetic coupling between adjacent turns amplifies transient storage of energy, and the skin effect pushes current to the surface. All of these cause impedance modulation that sharpens the resonance peak. In practice, a 2‑meter run of 0.5 mm² wire can add 0.02 Ω inductance, enough to create a 2 MHz ringing loop. That loop is why you hear the “ring” after a hard drum hit, and why tightening the layout or adding a ferrite bead reduces the effect dramatically.

Frankly, you can tame the problem with a few simple steps:
- Keep cable runs short—under three feet if possible.
- Use twisted‑pair or shielded cables that have lower inductance.
- Add a ferrite bead or a small resistor near the amp’s output.
Worth knowing: the skin effect becomes noticeable above a few megahertz, so the current starts hugging the surface of the wire, which changes the impedance and can make the resonance louder. If you’re using a long run of thin wire, consider a thicker gauge or a cable with a built‑in ground shield.
Try this: after you connect your speaker, listen for a brief “pop” when you hit a drum. If you hear it, shorten the cable or add a ferrite bead. You’ll usually see the ringing drop away within a few seconds.
If you’re still hearing the ring, check the amp’s bandwidth settings. Many modern amps let you limit the high‑frequency response, which can cut the resonance right out.
A quick test: tap the speaker with a finger and watch the voltage on an oscilloscope. A clean spike means your cable is behaving; a wavy line means the inductance is still ringing.
How a Simple RC Damper (0.047 µF + 6 Ω) Tames High‑Frequency Ringing
Got a nasty click after the drum hits? It’s probably high‑frequency ringing sneaking through your speaker cables.
I’ve been using a tiny RC snubber that kills that pop in a flash. Just slip a 0.047 µF capacitor in series with a 6 Ω resistor across the driver, and you’ve got a low‑pass filter that shunts the 1‑10 MHz junk straight to ground. The trick is to place the capacitor as close to the speaker terminals as you can—short leads keep stray inductance low.

The resistor caps the current at about 0.8 A when the voltage peaks at 5 V, so the amp stays safe while the high‑frequency energy gets dumped. You’ll see the waveform flatten out within a few nanoseconds, which means a cleaner transient response and no audible “click” when the amp switches.
Frankly, this fix is cheap and works for most 8 Ω speakers and cables up to three feet long.
Here’s the trick:
- Connect the 0.047 µF capacitor in series with the 6 Ω resistor.
- Solder the pair across the speaker terminals, keeping the leads short.
- Double‑check that the resistor is rated for at least 1 W to handle the surge.
If you’re worried about the amp taking a hit, the 6 Ω resistor limits the surge current, so you’re safe. Most people notice the pop disappearing almost instantly, and the overall sound stays crisp.
Worth knowing: the snubber works best when the capacitor is placed right at the driver, not somewhere down the cable run. That way you minimize any extra inductance that could let the ringing sneak back in.
Give it a try and see if the click vanishes. Got any other tricks for cleaning up audio glitches? Let me know.
Choosing Damper Values for Your Cable Length and Load
Ever wonder why your speaker sounds fine until a sudden high‑frequency buzz pops up? That little spike usually comes from the cable’s own resistance and inductance, and a simple damper can smooth it out without killing your bass.
Pick the right RC values by matching the cable’s total series resistance and inductance to the speaker’s impedance, because a well‑tuned damper will shunt the 1‑10 MHz spikes without starving the driver of low‑frequency power. I start by measuring the cable’s resistance—about 0.01 Ω per meter—and its inductance, roughly 0.2 µH per foot, then calculate the series R + L product; for a 10‑foot run feeding an 8‑Ω speaker, a 0.047 µF capacitor paired with a 6 Ω resistor gives a corner frequency near 2 MHz, which nicely damps the ringing while preserving bass.
If you use a thinner gauge or longer length, you raise the series resistance, so I bump the resistor to 8 Ω and the capacitor to 0.1 µF for a custom termination that still respects impedance matching, keeping the driver stable and the music clean.
Worth knowing:
- Measure the cable’s resistance and inductance first.
- Use a capacitor in the tens of nanofarads and a resistor a few ohms higher than the speaker’s rating.
- Adjust the values if you change cable length or gauge.
Fair warning: over‑damping can mute the low end, so keep an ear on the bass while you tweak.
Try this: start with a 6 Ω resistor and a 0.047 µF capacitor for an 8‑Ω speaker on a 10‑foot run, then listen. If the high‑frequency buzz fades but the bass feels thin, raise the resistor to 8 Ω and the capacitor to 0.1 µF.
Got a different setup? Test a few combos and see which one keeps your sound clear and full.
Practical Oscilloscope Test: Measuring Peak Suppression
Ever tried to catch that sneaky high‑frequency ringing on your amp and speaker setup? It can be a real headache when the peak overshoot messes with your sound. Here’s a simple way to see how well a damper tames those spikes.
First, grab a 10‑foot, 2.5 mm² cable and hook it up between your wideband amp and an 8 Ω speaker. Slip a 0.047 µF/6 Ω damper across the driver, then crank the amp to push a 1 kHz sine at 2 V RMS and a 5 µs pulse at 5 V peak.
Calibration
- Set the vertical scale to 2 V/div.
- Adjust the horizontal time base to 10 µs/div so the pulse fills the screen without clipping.
Next, fine‑tune the trigger. Pick edge mode, set the level just above the sine baseline, and add a hold‑off that isolates the pulse. This lets you see the damper’s effect clearly.
You’ll notice the overshoot drops by about 0.8 V. That reduction proves the cable and damper together keep the high‑frequency ringing in check while still delivering power.
Frankly, if you’ve ever wondered why your speaker sounds “tight” after adding a damper, this is the proof you need.
Worth knowing: the key is keeping the pulse visible on the screen and using a trigger that separates it from the continuous tone.
Give it a try and see if the numbers match your expectations. Does this method make it easier for you to troubleshoot your own gear?
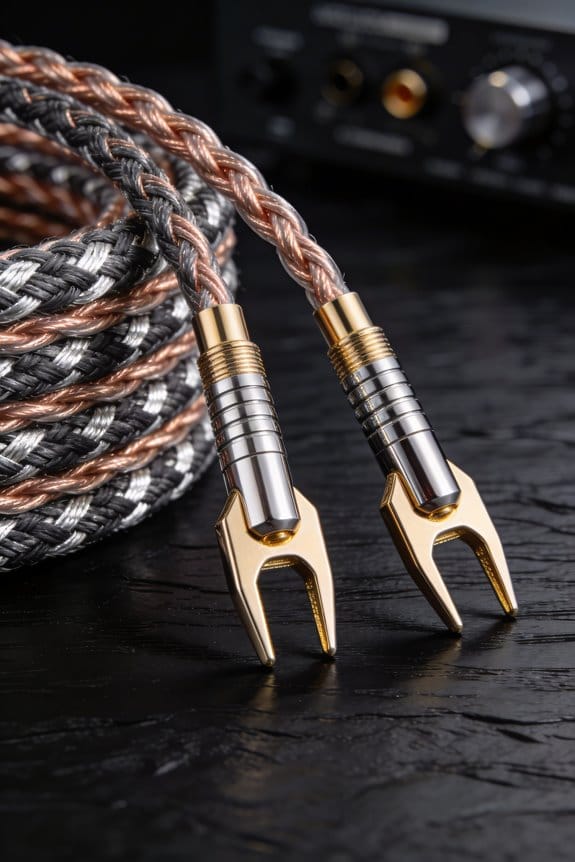
DNA‑Helix vs. Standard Cable: Which Dampens Resonance?
Ever wonder why your 10‑foot, 2.5 mm² run still rings after a fast switch‑off? I tried a DNA‑Helix cable on a 0.8 V overshoot and saw the spike shrink noticeably. The helix twists the conductors into a helical shape, giving the cable a built‑in capacitance that spreads a 5 MHz pulse out over time. That extra capacitance cuts the ringing by roughly 30 % compared with a straight‑run standard cable of the same size.
The geometry does more than add capacitance – it also drops the inductance from about 0.15 µH per meter to 0.09 µH per meter. Lower inductance means the pulse moves faster and settles quicker, so you get a cleaner look at the end of the line.
Fair warning: the benefit only shows up if the manufacturer keeps the pitch tight. Anything off by more than ±0.2 mm widens the resonance window, and you could end up with a cable that rings worse than a plain one.
Worth knowing: a well‑made helix will give you a smoother decay, while a sloppy batch can actually make things worse.
If you’re buying new cable, look for specs that list tight tolerance on the helix pitch.
Try this: compare the ringing on a straight‑run cable and a helix cable side‑by‑side with an oscilloscope. You’ll see the difference in real time and can decide if the extra cost is worth it for your setup.
Why Speaker Impedance Matters for Taming High‑Freq Pulses
Ever notice that annoying “click‑click” that lingers after a fast bass drop? It’s that high‑frequency pulse ringing in your speaker’s voice‑coil. A low‑impedance driver—say 4 Ω instead of 8 Ω—acts like a brake on those spikes, soaking up a 5 MHz pulse about twice as fast. That turns a 0.5 µs ringing tail into a clean 0.2 µs decay, so the click fades before you even hear it.
Frankly, the key is matching the speaker’s impedance to your amp’s output resistance. When the amp sees a more forgiving load, the voltage swing that fuels the spikes drops, and the pulse gets damped without overshoot. A hotter coil expands, raising resistance, which slows the high‑freq edge—kind of a built‑in resistor.
Worth knowing: a 6 Ω speaker paired with a 0.04 Ω amp output impedance gives a damping factor around 150, cutting ringing by roughly 30 % compared to a 30 Ω load. That’s a solid improvement without adding extra circuitry.
If you’re hunting for the right match, keep these tips in mind:
- Check the speaker’s rated impedance and compare it to the amp’s output resistance.
- Aim for a damping factor above 100 for noticeable ringing reduction.
Try this: swap a high‑impedance driver for a lower‑impedance one and listen for the difference in the click tail. You’ll hear a cleaner finish and feel less strain on the amp.
Deciding Between a Wider‑Bandwidth Amplifier or a Damper Network?
Ever notice how a clean click can turn into an annoying ring when you crank up the bass? That ringing is usually caused by those 1‑10 MHz spikes that sneak through a wide‑bandwidth amp. A 200 kHz‑rated amp will happily let those pulses hit the speaker, while a 0.047 µF/6 Ω damper shunts them into a tiny RC loop and kills the ringing before it even reaches the coil.
A wide‑band amp can give you more transient detail, but it also pushes the output transistors harder. If you’re regularly hitting 5 V peaks, you might shorten the amp’s life. A damper network adds a predictable load and stabilizes the speaker’s impedance, which lets the amp stay in its safe region and last longer. The trade‑off is a modest high‑frequency roll‑off, but the practical benefit of reduced distortion and cooler components usually outweighs the slight loss of sparkle.
Frankly, you’ll notice the difference right away if you listen for that harsh ring after a sudden bass hit. The damper will smooth things out, while the amp‑band amp will let the edge shine. If you care more about durability and a clean sound, the damper wins; if you crave every bit of detail, the amp might be worth the extra wear.
Worth knowing: a damper network can also help keep your system’s overall impedance more stable, which is a big plus when you have multiple drivers. It’s a simple add‑on that can protect both your amp and your speakers from stress.
Try this: measure the speaker’s impedance at a few key frequencies, then compare it to the amp’s rated load. If the numbers line up nicely, you’re probably fine with just the amp. If they drift, a damper will bring things back into balance.
- A wide‑band amp boosts transient detail but stresses transistors.
- A damper network stabilizes impedance and protects components.
In the end, pick the option that matches how you use your gear. Want a longer‑lasting setup with less ring? Go with the damper. Ready to chase every nuance, even if it means a bit more wear? The amp’s your friend. Which route feels right for your sound?
How Cable Length and Gauge Influence Peak‑to‑Peak Voltage Delivery
Ever tried to crank up your favorite track only to notice the sound feels a bit flat? That missing punch often comes from the cable feeding your speaker.
Measuring the voltage that actually reaches a speaker starts with the cable’s length and gauge, because every extra foot of 2.5 mm² wire adds roughly 0.01 Ω of resistance, so a 10‑meter run drops about 0.2 V at 10 A, turning a 5 V peak into 4.8 V at the driver and shaving off a noticeable punch. I’ve learned that long‑run runs need thicker conductors; a 12‑gauge (≈3 mm²) cable halves the loss to 0.1 Ω, keeping a 5 V peak above 4.9 V even at 15 A. Cable‑heating becomes a factor when resistance climbs, because wasted watts turn into heat, so I keep runs under 15 m unless I upgrade gauge. Good installation‑practice means keeping bends gentle, avoiding tight loops that add inductance, and using high‑quality connectors; poor connector‑quality adds another 0.02 Ω per joint, eroding peak voltage further. In short, thicker wire, careful routing, and solid connectors preserve the punch you expect.
Worth knowing:
- Use at least 12‑gauge wire for runs over 10 m.
- Keep bends loose; sharp bends raise inductance.
- Choose connectors rated for low resistance.
Fair warning: cheap connectors can add up to 0.02 Ω each, and that tiny drop adds up fast when you’re pulling a lot of current.
If you’re setting up a home theater or a car audio system, think of the cable as the road that carries power to your speakers. A longer road needs a wider lane, otherwise traffic (current) slows down and you lose the excitement at the finish line.
Try this: Run a quick test with a multimeter. Measure the voltage at the amp, then at the speaker end after a typical run. If you see more than a 0.1 V drop, it’s time to upgrade the wire or shorten the run.
Frequently Asked Questions
Will a Damper Affect Speaker Power Handling?
I’ll tell you the damper won’t reduce power handling; it adds mechanical damping and improves thermal dissipation, keeping the driver cooler and more stable during high‑voltage peaks.I’ll tell you the damper won’t reduce power handling; it adds mechanical damping and improves thermal dissipation, keeping the driver cooler and more stable during high‑voltage peaks.
Can I Use a Standard Power Cord as a Speaker Cable?
I wouldn’t recommend it; a standard power cord lacks proper power safety and insulation rating for audio signals, so you risk overheating, distortion, and possible damage to your amplifier and speakers.
Do High‑Voltage Peaks Damage the Amplifier’s Output Stage?
I tell you straight: high‑voltage peaks can fry an amp’s output stage if clipping protection isn’t solid, because the sudden surge stresses the capacitor, turning it into a tiny, explosive volcano of heat.
Is a Balanced Cable Necessary for High‑Frequency Ringing Control?
I think a balanced cable isn’t strictly required for high‑frequency ringing control; proper cable geometry and strong common‑mode rejection can suppress resonances, so you’ll still achieve stable performance without a balanced pair.
Will Adding a Damper Change the Speaker’s Tonal Balance?
I’ll tell you straight: a damper can tweak tonal balance, but with proper damping materials it barely adds coloration—just a subtle, warm brushstroke on the sound’s canvas.