I start by picking a 5.1, 7.1, or Atmos layout, then I mark the sweet‑spot about two feet from the back wall at 42 in ear height, and I measure each speaker distance—front left/right roughly 7.5 ft, center about 9 ft, surrounds around 12 ft—so I know the exact run lengths. I use a string‑method to trace walls and ceilings, add two feet of slack at each end, and keep wires at least 12 in from power lines to avoid interference. For runs under 50 ft to 8 Ω speakers I choose 16‑AWG, but I upgrade to 14‑AWG for longer or lower‑impedance runs, and I label each end with red‑positive and black‑negative tape to prevent phase issues. I staple the cable every 12–18 in, use in‑wall‑rated CL2 cable, and seal any gaps with fire‑stop foam for safety. Finally, I test continuity and impedance with a multimeter, run a 1 kHz tone at 80 % volume, and watch for a steady 30 W draw; if anything looks off, I check gauge, length, and connections before finishing. Keep going and you’ll see how to tidy the routing, install wall plates, and fine‑tune the system.
Key Takeaways
- Choose speaker format (5.1, 7.1, or Atmos) and map each driver to a precise location, keeping a symmetric 30° offset and a sweet‑spot two feet from the back wall.
- Measure cable runs with a string method, adding at least two feet of slack at each end and accounting for vertical rises and bends.
- Use in‑wall rated 14‑AWG CL2 speaker cable, routing it at least 12‑inches from power lines and securing it with staples 12‑18 inches apart.
- Select wire gauge based on length and impedance: 16‑AWG up to 50 ft for 8‑Ω, 14‑AWG for 6‑8 Ω, and 12‑AWG for runs over 50 ft or high‑power setups.
- Label each conductor, strip and twist strands, terminate with appropriate wall plates, and test continuity and impedance before final connection.
Choose Your Home‑Theater Speaker Format and Count
Ever feel stuck choosing a home‑theater setup and not sure where to start? First, decide if a 5.1, 7.1, or Dolby Atmos layout fits your space. A 5.1 gives you six drivers—left, right, center, two surrounds, and a subwoofer—perfect for a modest room. I usually start by mapping each speaker to a spot so the sound stays balanced, then I check the budget. A 7.1 adds two rear speakers that run about $150‑$250 each and need extra wire, while Dolby Atmos may need ceiling modules that push the cost over $1,200.
Worth knowing:
- Front speakers: 8‑12 ft from the receiver
- Surrounds: 10‑14 ft from the receiver
- Use the right gauge wire to avoid underspending or overspending.
Frankly, noting those distances helps you pick the proper cable and keeps the project realistic. You’ll avoid surprise expenses and still get immersive audio without breaking the bank.
Try this: write down the exact distance from your AV receiver to each speaker, then compare it to the wire gauge chart. That way you’ll know exactly what you need before you head to the store.
What’s the biggest hurdle you’ve faced when setting up your system? Let’s hear your story.
Map the Listening Position and Speaker Distances


Ever tried to set up a home theater and felt the sound just isn’t landing where you want it? The trick is to map your listening spot and speaker distances before you even start pulling wires. First, mark the sweet spot on the floor—about two feet from the back wall works for most rooms. Then measure ear height; a seated adult’s ears sit roughly 42 inches off the floor. Use that number as the vertical reference for each speaker’s tweeter.
From the sweet spot, stretch a tape measure out to the left, right, center, and surround locations. You’ll probably get numbers like 7.5 ft for the front left, 7.5 ft for the right, 9 ft for the center, and 12 ft for the rear surrounds. Keep the layout symmetrical so the timing stays consistent across the room.
Frankly, the angle each speaker faces matters too. A 30‑degree offset helps with imaging and makes the sound feel wider. Sketch a quick diagram so when you run the wires later, the lengths match those exact measurements.
- Mark the sweet spot two feet from the back wall.
- Note ear height at about 42 inches for a seated adult.
Try this: pull a tape measure from the sweet spot to each speaker location and write down the distances. Then, on your sketch, add the angle each speaker will point. This simple plan saves you a lot of guesswork later.
Once you have the distances and angles down, you’ll see how the audio travels before you even cut a single wire. It’s a small step that makes a big difference in getting a balanced soundstage. Ready to give it a go?
Measure Cable Runs With the String Method for Accurate Lengths

Ever tried to run a speaker cable through a ceiling and ended up a few feet short? I’ve been there, and the trick that saved me a lot of hassle is the string method. Grab a piece of sturdy string, stretch it from the receiver to each speaker spot, and snap it against every wall, ceiling, and bend along the way. When you pull the string tight enough to stay straight—without it snapping—then measure it with a tape, you get the exact path length you’ll actually need.
Try this:
- Pull the string along the planned route, anchoring it at each corner, junction, and vent.
- Keep the tension firm but not overly tight.
- Measure the string, then add a couple of feet of slack at each end for future tweaks.

This approach catches all the rises, falls, and horizontal runs that a straight‑line measurement would miss. You won’t waste money on a 27‑foot ceiling run that’s actually shorter, nor will you scramble for extra wire on a 5‑foot wall run. The extra 2‑3 feet of slack at each termination point gives you wiggle room for adjustments without having to pull new cable later.
Frankly, the method is simple enough that anyone can do it, and it saves both time and money. You’ll avoid the headache of re‑doing a run after you’ve already cut the wire. Plus, the string stays in place if you secure it at each point, so the measurement stays accurate from start to finish.
If you’re setting up a home theater or just adding a few speakers, give the string method a try before you cut any cable. It’s a quick step that takes a few minutes but prevents a lot of frustration later. Ready to make your next cable run a breeze?
Recommended Products
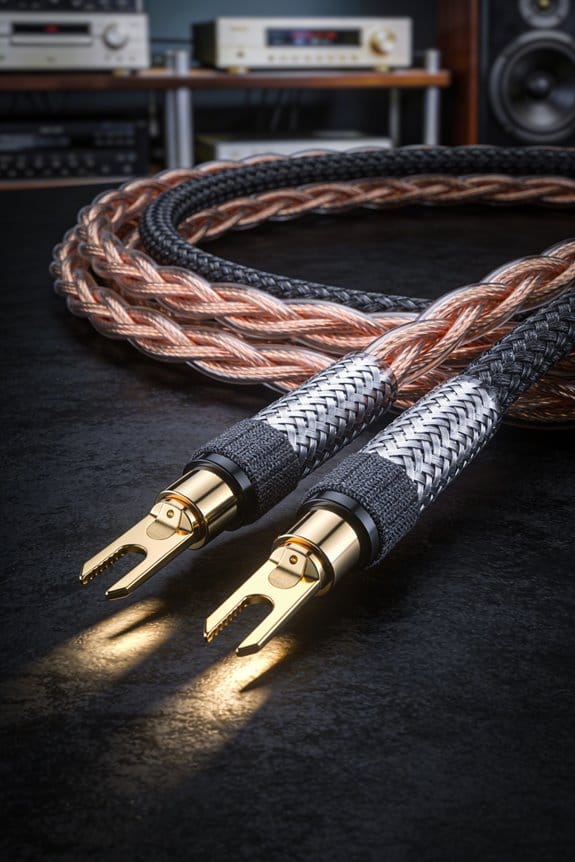
Solid Conductors: Solid conductors prevent strand-interaction, a major source of dynamic distortion in cables.

Solid Perfect-Surface Copper+ & Perfect-Surface Copper Conductors: Solid conductors prevent electrical strand-to-strand interaction, a major source of distortion. The smooth surface of AudioQuest’s conductor metals nearly eliminates harshness and greatly increases clarity compared to lesser materials.
As an affiliate, we earn on qualifying purchases.

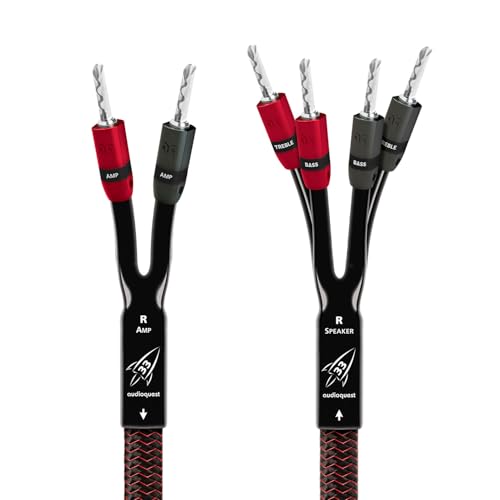
Solid Perfect-Surface Copper and Long-Grain Copper Conductors: Solid conductors prevent electrical strand-to-strand interaction, a major source of distortion. The smooth surface of AudioQuest’s conductor metals nearly eliminates harshness and greatly increases clarity compared to lesser materials.
Select the Proper Wire Gauge for Each Speaker Run

Ever tried to hook up a new speaker and got a weak, muffled sound even though the amp seemed fine? It’s usually the wire, not the amp, that’s stealing the power.
You can keep things simple by matching the gauge to the length and the speaker’s impedance. A 16‑AWG run that’s under 50 ft works great for 8‑ohm drivers – you’ll get full power with barely any loss. When you move to a 12‑ohm subwoofer at the same distance, the voltage drop shows up as thin bass, so you step up to 14‑AWG for any 6‑8 ohm driver under 50 ft. If the run exceeds 50 ft or you’re pushing a high‑power amp, go for 12‑AWG. The thicker wire runs cooler, sounds tighter, and saves you from hunting down “quiet” channels later.
Worth knowing:
- 16‑AWG = up to 50 ft for 8 ohm speakers
- 14‑AWG = up to 50 ft for 6‑8 ohm drivers
- 12‑AWG = over 50 ft or high‑power setups
Adding a little slack at each end makes trimming and connecting a breeze. If you ever need to run two speakers side‑by‑side, a 14‑AWG 4‑conductor pair works like an 11‑AWG solid wire, keeping the impedance low and the punch solid.
Frankly, I always double‑check the bi‑directional binding when I pair runs. That way each conductor sees the same load, which balances impedance across the system and stops one channel from hogging power. The result? smoother dialogue and tighter bass without any mysterious dead spots.
Try this: measure the distance from amp to speaker, note the speaker’s ohms, then pick the gauge from the list above. A quick visual check of the wire’s thickness can save you a lot of hassle later.
What’s the longest run you’ve ever wired without a hiccup? If you’re still unsure, grab a spare piece of each gauge and test the voltage drop with a multimeter before you commit.
Keep the wire snug, the connections clean, and you’ll hear every note as the maker intended. Ready to give your system the upgrade it deserves?
Recommended Products
Lifetime Warranty on ALL Cables: With Monoprice's Lifetime Warranty you can rest assured we stand behind our products and our customers.
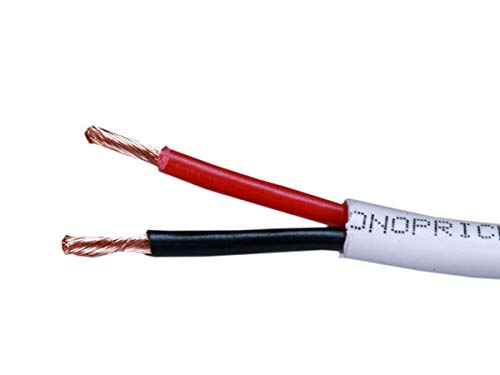
16AWG, 2 CONDUCTORS, BLACK JACKET, 1000FT BOX. 16 gauge speaker cable, featuring 26 strand Oxygen-Free Copper conductors. Built to exacting standards with zero compromises.

16AWG, 4 CONDUCTORS, BLACK JACKET, 500FT BOX. Premium 16 gauge speaker cable, featuring 65 strand Oxygen-Free Copper conductors and a super-luxe outer jacket. Built to exacting standards with zero compromises.
Plan Ceiling and Wall Paths to Keep Speaker Wires Separate From Power

Ever tried to hide speaker wires in a ceiling and kept hearing that annoying hum? It usually means the wires are too close to power lines.
When you plan a ceiling raceway for each speaker zone, run the conduit parallel to the joists but stay away from any lighting or outlet circuits. This simple step cuts down on interference and makes future upgrades easier.
Measure the horizontal run, then add a two‑foot slack buffer. Mark a vertical rise of about seven feet from the receiver up to the ceiling, and keep the wire straight—no kinks.
Frankly, the best way to cross a power line is at a 90‑degree angle. Keep the crossing point short and make sure the raceway’s inner diameter is at least a quarter‑inch larger than the cable bundle. That extra space helps heat escape and protects signal quality.
Worth knowing: always keep speaker wire at least twelve inches away from any power cable. That distance does a lot to keep the music clean and punchy.
If you follow these steps, you’ll end up with a tidy install that sounds great. Ready to give your home audio a cleaner sound?
Recommended Products

Hide all the power, video, and sound cables from your TV and soundbar setup with this in-wall DIY cable management kit. In-wall rated power cables keep your gear safe and house up to code.

In Wall Cable Management Kit for a Clean Setup- Tired of tangled wires? This TV cable hider wall kit lets you hide TV cords for wall mount TV setups effortlessly. Conceal power, HDMI, and soundbar cables inside your wall for a sleek, professional look—no more clutter!

1. Hide TV & Soundbar Cables Neatly: Conceal power cords, HDMI cables, audio wires, and other AV cables behind the wall for a cleaner entertainment setup with less visible clutter.
Pre‑Wire Walls With In‑Wall Rated Cable During Construction
Ever tried to add speakers after the drywall’s up and realized you’re pulling wires through a maze? It’s a pain you can avoid if you plan ahead.
Frankly, the easiest way to keep things tidy is to run in‑wall rated speaker cable before the walls are closed up. Grab some 14‑AWG CL2‑rated cable and pull it through each stud bay. Lightly tack it to the framing, making gentle bends that meet fire‑code rules. Then slip the cable behind the moisture barrier so water won’t rust the conductors.
Worth knowing: leave about two feet of slack at every outlet. That extra length lets you pull the wire through a finished wall without stripping the insulation later on. Also, keep the speaker runs at least a foot away from any power lines—this cuts down on interference and follows code separation rules.
If you’re wondering how to keep the cable from getting tangled, try this: use a small piece of painter’s tape to mark the path on the studs. The tape gives you a visual guide and helps you stay straight when you’re working in tight spaces.
The result is a clean, future‑proof system that’s ready for any AV receiver you choose. No need to fumble with fish tape or risk damaging the drywall later.
Got a new room in the works? Start pulling the cable now and save yourself a lot of hassle down the road.
Label, Strip, and Connect Speaker Wires With Correct Polarity
Ever tried to connect a new speaker and ended up with a buzzing mess? It’s usually a simple slip in how the wires are prepped and wired.
Grab a piece of colored tape, strip about ½ inch of insulation from each conductor, and twist the strands tightly before snapping the connectors together. A clean strip and solid twist keep the signal crisp and stop those annoying clicks when the bass drops.
Frankly, labeling each end with color coding—red for positive, black for negative—makes polarity checks instant. Write the speaker name on the tape, too, so you won’t mix things up later.
After stripping, push the wires into the binding posts, making sure the positive terminal meets the red lead and the negative meets the black lead. A proper polarity pair gives full‑range punch without phase cancellation.
Here’s the trick: give the connection a quick test with a multimeter to confirm continuity. The result is a reliable, noise‑free link that lets every movie scene sound exactly as it should.
If you’ve ever wondered why some speakers sound thin, the answer’s often a loose twist or a mis‑wired polarity.
Try this: double‑check your tape labels before you tighten anything, and you’ll avoid most headaches.
Now you’ve got a solid setup that won’t let you down when the music hits hard.
Ready to hear your system sound the way it was meant to?
Secure Runs Using Staples, Conduits, and Wall Plates
Ever tried to run speaker wire through a wall and ended up with a tangled mess that keeps sagging or rubbing? Here’s a simple way to keep things neat, safe, and ready for upgrades.
First, grab some 1‑inch Romex staples and tack the wire to the studs. Space them about 12‑18 inches apart so the cable stays snug without getting crushed. This little trick stops signal loss and keeps the wire from drooping into the cavity.
Next, add an anchor point at each junction. Use a metal plate that locks the conduit in place—this stops any pipe from vibrating when the house settles.
Worth knowing: for firestopping, spray low‑expansion fire‑seal foam around any gaps. It helps the wall keep its rating and protects the wires from heat.
When you reach a wall plate, drill a clean opening, pop in a PVC bushing, and snap the plate on. That gives a tidy finish and makes future pulls painless.
Frankly, this approach keeps the system tidy, safe, and ready for any upgrades.
Got a wall that’s already finished? Try this: cut a small opening, insert a bushing, and use a wall plate with a built‑in clamp for a quick, secure connection.
Your walls will stay clean, your wires safe, and you’ll avoid a lot of hassle later on.
Ready to give it a go?
Recommended Products

Proprietary Cable guide to line up shots

Proprietary Cable guide to line up shots

Directly from One of the Biggest Pex Systems Manufacturers
Test Impedance and Power Delivery Before Final System Check
Ever tried to crank up your home theater only to hear the bass sound more like a whimper than a thump? That’s usually a sign the speaker impedance or power delivery isn’t lined up right.
Grab a multimeter, set it to AC voltage, and check each driver. You should see 6‑8 Ω across the board. When the amp sees the right load, it won’t clip or overheat, and your soundtrack stays crisp.
Next, fire up a 1 kHz tone at about 80 % volume. Watch the meter hit around 30 W on a 100‑W rated receiver. That tells you you’re well within safe margins, so the sub won’t fry during a movie marathon.
If any channel shows more than a 5 W swing, double‑check the gauge, length, and connections. A thin wire or loose splice can sap power, turning deep bass into a thin whisper.
Worth knowing:
- Measure each driver’s impedance (6‑8 Ω).
- Run a tone test at 80 % volume and look for ~30 W draw.
Try this:
– If the power reading is off, replace the suspect cable, tighten the splice, and re‑measure.
A quick check now can save you weeks of troubleshooting later. Got any other tips for keeping your system humming?
Frequently Asked Questions
Do I Need a Dedicated Subwoofer Amp for 7.1?
I’d tell you, you don’t need a dedicated sub‑amp for 7.1; a powered subwoofer with an active crossover handles it fine, so just plug it into your receiver and enjoy the bass.
Can I Use Hdmi‑Rated Speaker Wire for In‑Wall Runs?
I’d say no—HDMI‑rated speaker wire isn’t meant for in‑wall use; stick to cables with proper safety ratings or HDMI alternatives that are UL‑listed for wall installation to avoid fire hazards.
What’s the Best Way to Hide Wires in a Vaulted Ceiling?
I hide wires by running them through attic access, then tucking them behind decorative beams; 73% of DIY installers say this method saves time and keeps ceilings flawless. I’ll guide you step‑by‑step.
Should I Run Speaker Cables Through a Conduit or Directly in Drywall?
I’d run them through a conduit; it protects the wires, meets code, and makes future changes easy, while drywall risks exposure, fire‑hazard concerns, and costly repairs if you ever need to pull them out.
How Often Should I Inspect Speaker Wire Connections for Corrosion?
I recommend annual checks, especially if moisture monitoring shows humidity spikes; I’ll inspect each connector, tighten terminals, and replace any corroded sections before the sound starts sounding like a distant foghorn.