
I start by sketching each room on graph paper, noting exact dimensions like 12 ft × 15 ft and furniture placement, then I mark speaker spots—front left/right at ear level, center just above the TV, surrounds 1–2 ft behind the couch—so I can draw receiver‑to‑speaker runs, add a 10 % slack margin for obstacles, and log every distance in a spreadsheet; I choose 16‑gauge wire for runs under 50 ft, 14‑gauge for 50–150 ft, and 12‑gauge for longer or high‑power paths, adding 10 % extra before rounding up to the nearest foot and buying oxygen‑free copper; I drill 3/4‑inch holes in studs, keep a 1‑inch clearance from pipes, use flexible metal conduit at joists, seal openings with fire‑rated caulk, and route cables under floors in shallow trenches covered by non‑flammable board; I connect the receiver’s LFE to the subwoofer with a short, well‑shielded 75‑Ω RCA cable, keep terminals snug, separate RCA from power cords, and zip‑tie everything to avoid strain; finally I verify polarity (red to red, black to black), test phase with a 10 ms tone, adjust until all cones move together, and listen for cohesive bass—keep going and you’ll discover the next steps.
Key Takeaways
- Plan speaker locations on a floor plan, noting exact room dimensions and furniture, then map receiver‑to‑speaker runs with a 10 % slack margin.
- Choose wire gauge based on run length (16‑AWG < 50 ft, 14‑AWG 50‑150 ft, 12‑AWG > 150 ft) and add 10 % extra length before purchasing.
- Drill 3/4‑in. holes in studs, keeping ≥1 in. clearance from pipes/electrical, and protect cables with conduit or fire‑rated caulk where needed.
- Use short, well‑shielded RCA cables for subwoofer LFE connections, keep them away from power cords, and secure all routing with zip ties.
- Verify polarity (red‑to‑red, black‑to‑black) and phase using a 10 ms test tone, adjusting wiring or receiver phase control until speakers move cohesively.
Map Wire Measurements & Speaker Layout for Precise Speaker Wiring
Got a room that feels cramped but you still want a clean speaker setup? You’re not alone—many folks wrestle with figuring out how much wire they actually need before they start cutting and connecting.
Start by pulling out a tape measure and sketching the room on a sheet of graph paper. Once you’ve got the exact dimensions—say, 12 ft × 15 ft with a 3‑ft‑deep TV console—you can calculate the exact wire runs for each speaker and avoid guess‑work later. Mark the speaker positions, noting room acoustics and furniture placement so the front left and right sit at ear level, the center sits just above the TV, and the surrounds sit 1‑2 ft above ear level behind the seating.
Draw lines from the receiver to each mark, measuring the total distance, adding a 10 % slack margin for routing around baseboards, and noting any obstacles like a bookshelf that could affect acoustics. Those numbers become the wire‑length plan, making sure each speaker gets the right length without tension or excess coil.
Frankly, a quick visual check can save you a lot of hassle. If a cable has to go around a door frame or under a rug, you’ll see it on the sketch and can add a little extra length right away.
Worth knowing: use a simple spreadsheet to log each speaker’s distance, the slack you added, and the final cable length you’ll buy. It’s easy to copy‑paste the numbers and you’ll have a tidy reference for future upgrades.

Once you’ve got the plan, grab the right gauge wire for each channel, cut it to the measured length, and run it along the baseboards or inside the wall if you’re comfortable with that. Keep the cables neat—tape them down or use clips so they don’t dangle.
Finally, connect each speaker, test the sound, and adjust the placement if something feels off. A little tweaking now can make a big difference in how the room sounds later.
Got any tricks of your own for planning speaker wiring? Share them below!
Recommended Products

Specification: 1000-Feet 16AWG*2C, Strand copper, Black, Maximum working voltage: 300V, Great for uses with 30 volts or less

[CL3 RATED Speaker Wire]Engineered for professional reliability, our 10 gauge wire is CL3 rated for secure in-wall and outdoor installations. The flame-retardant jacket resists fraying and environmental wear while remaining remarkably soft and flexible - allowing for an easy pull through tight corners or wall studs without kinking. Ideal for home theaters, church sound systems, rugged outdoor projects, or automotive installations

As an affiliate, we earn on qualifying purchases.

462 Strands of 100% pure Oxygen Free Copper per conductor
Choose the Right Wire Types & Calculate Lengths for Accurate Speaker Wiring

Ever tried to get your home theater sounding tight, only to hear the bass sag when you crank the volume? The culprit is often the speaker wire you chose.
Pick the right gauge—usually 16‑gauge for runs under 50 ft, 14‑gauge for 50‑150 ft, and 12‑gauge for anything longer or for high‑power setups—because thicker wire drops less resistance, keeping the bass tight and the volume consistent across the room, and it also prevents the dreaded “warm‑up” feeling in your receiver’s output stage.
I always go with oxygen‑free copper; its lower oxidation means the signal stays clean, so you’ll hear every detail without hiss.
When you calculate length, measure the exact path from receiver to speaker, add 10 % extra for slack, then round up to the nearest foot. This makes sure the gauge matches the distance and power needs, prevents voltage drop, and preserves tonal balance.

Worth knowing:
- Use a wire gauge that fits the distance and power you need.
- Add a little extra length for routing and future moves.
Frankly, the right wire makes your setup look professional instead of a DIY nightmare.
Got a favorite brand of speaker cable? Let me know how it works for you.
Recommended Products

Monoprice Plenum Speaker Wire | uses an external cable jacket, which has been specially treated to resist the spread of fire.

Lifetime Warranty on ALL Cables: With Monoprice's Lifetime Warranty you can rest assured we stand behind our products and our customers.

Lifetime Warranty on ALL Cables: With Monoprice's Lifetime Warranty you can rest assured we stand behind our products and our customers.
Run Speaker Cables Through Walls and Under Floors Safely
Ever tried to hide speaker wires and end up with a wall full of spaghetti? You’ve probably already picked the right gauge and left a little slack, but getting the cables in place without a mess takes a bit more care.
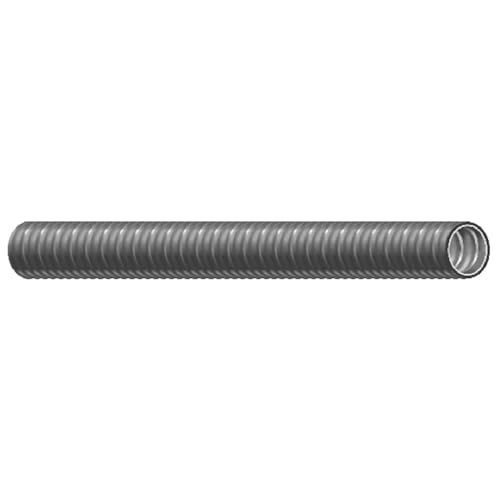
First, drill a ¾‑inch hole right at the center of each stud. Push the wire through the cavity, but keep at least an inch of space from any pipe or electrical line—fire codes love that clearance. When you have to cross joists, slip the wire into a flexible metal conduit; it shields the cable and stops it from rubbing on rough wood, which can mess up the signal.
Under the floor, dig a shallow trench and lay the cable flat. Cover it with a half‑inch layer of non‑flammable insulation board; this keeps heat away and meets the required clearance. Finally, seal every opening with fire‑rated caulk so the wall’s fire barrier stays solid while the wire stays out of sight.
Worth knowing: use a stud finder before you start drilling to avoid hidden pipes or wires. A simple piece of painter’s tape can mark the spot where the cable should exit the wall, keeping your work tidy. And if you’re working around a corner, a short piece of flexible conduit can guide the wire around the bend without kinking it.
Frankly, the biggest mistake people make is ignoring the fire‑safety clearance. A quick check with a ruler can save you a lot of hassle later. And remember, a neat job not only looks good but also protects the signal from interference.
Got a tricky spot in your house? Try this: run the wire through a shallow groove in the drywall before you finish the final layer of plaster. It’s an easy way to keep the cable hidden without extra bulk.
Recommended Products

NOMINAL SIZE: 2" (44mm / 1.73in ID - 52mm / 2.05in OD) | Length: 100 Feet | Color: Orange | Attention: Measure the Outside Diameter of your cable bundle, and make sure its less than the Inside Diameter (I.D) of the wire loom size you choose
Smooth metal interior for easy wiring pulling

Constructed from LDPE – low density polyethylene – solvent and acid resistant
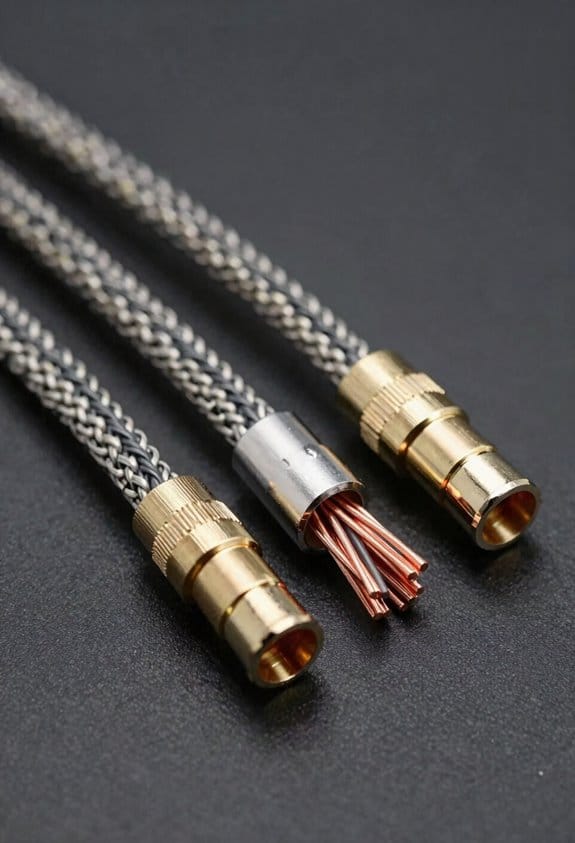
Connect Receiver and Subwoofer Wiring Securely

Ever found yourself staring at a subwoofer that just won’t deliver the deep thump you expect, even though you’ve got a fancy receiver? The trick is in the wiring, and a few simple steps can make that bass roar without a hiss.
First, match the receiver’s LFE output to the subwoofer’s dedicated input. Grab a 75‑Ω, 2‑meter (6‑foot) RCA cable that’s built for low‑frequency power. A short, well‑shielded run cuts down on signal loss and keeps hum at bay, so you hear clean, powerful bass.
Before you plug anything in, give the receiver’s terminals a quick look. Tighten the screws just enough to bite—over‑tightening can strip threads, and loose connections cause crackle and drop‑outs. A snug, clean connection lets the subwoofer respond instantly, delivering punchy, distortion‑free lows that fill the room.
When you route the cable, keep it away from power cords. Ground loops are the sneaky culprits behind that annoying buzz that can ruin a movie night. Using a single‑point ground or a ground‑loop isolator stops the noise, letting you enjoy your soundtrack without distraction.
Try this: run the RCA cable along the back of your furniture, securing it with a few zip ties. This keeps it tidy, reduces strain on the connectors, and makes future adjustments a breeze.
- Check that the RCA cable is short and shielded.
- Keep it separated from power cords and use a ground‑loop isolator if needed.
With these steps, your subwoofer will pump out deep, clean bass that hits just right. Ready to feel the music move the room?
Recommended Products

Package Includes: (2) Rockville RSG12.2 Dual 12” 2000 Watt 3-Way 4-Ohm Passive DJ/Pro Audio PA Speakers, (1) Rockville RPM870 8 Channel 6000w Powered Mixer w/USB, Effects, 6 XDR2 Mic Pres, (2) Rockville RCTS1610 10' 16 AWG Speakon to Speakon Speaker Cable 100% Copper.

POWERFUL - Experience deep, resonant bass with the JBL BassPro Hub, delivering 200W RMS output and a Bass Boost feature adjustable from 0 to 12dB at 50Hz for incredible sound clarity.

Package Includes: (1) Rockville RPA60BT V2 1000 Watt 2-Ch USB Bluetooth DJ/Pro/Karaoke Amplifier Mixer, (4) Pair Rockville HC55-16 White 5.25" 300 Watt In-Ceiling Home Theater Speakers 16 Ohm, (1) Rockville Rock Shaker 8" Inch Black 400W Powered Home Theater Subwoofer Sub, (1) Rockville RCDR25B 25' Ft. Dual RCA to Dual RCA Pro Audio Cable 100% Copper.
Check Polarity and Phase, Then Test Audio Quality Before Finishing
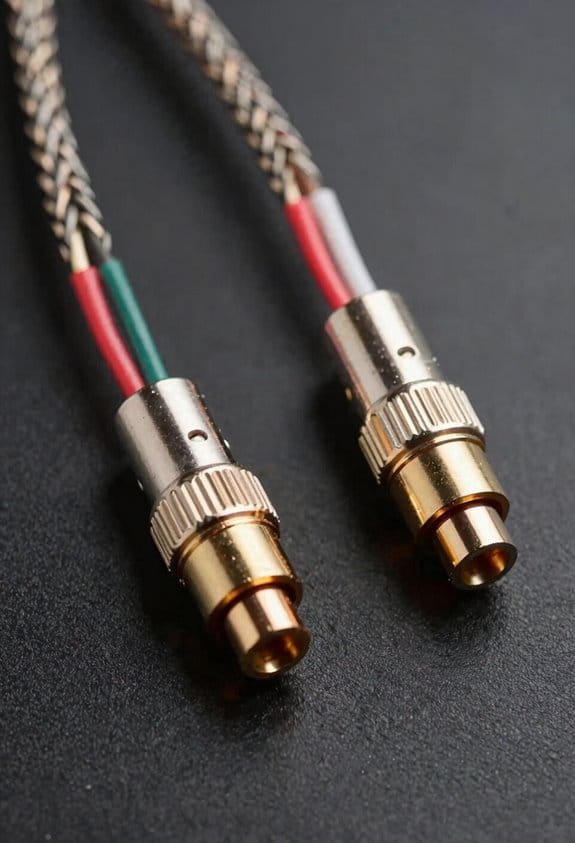
Ever noticed how a fresh subwoofer can sound like a weak thump instead of that deep boom you expect? It usually comes down to two easy‑to‑miss steps: polarity and phase. Getting those right before you hit play can save you a lot of frustration.
First, double‑check polarity. Make sure every red (+) wire plugs into a red terminal and every black (–) wire into a black one. If you mix them up, the left and right speakers will cancel each other out, leaving the soundstage thin and hollow. A quick visual scan usually catches any mistakes.
Next, line up the phase. Grab a 10 ms test tone and a multimeter, then watch the sub’s driver move in sync with the main speakers. A 180° shift will make the bass disappear at certain spots, so you want the driver’s motion to match the rest of the system. It’s a simple test, but it makes a huge difference in how tight the low end feels.
Worth knowing: after wiring and alignment, run a short audio‑quality check with a movie clip you know well. Listen for tight bass, clear mids, and balanced highs. If you hear clicks, delays, or a watery feel, go back and tweak polarity or phase until everything sounds cohesive.
- Verify polarity: red to red, black to black.
- Test phase with a 10 ms tone and multimeter.
Frankly, once those steps are done, the sub will finally deliver the punch you wanted. Have you tried these checks before, or do you usually jump straight to the music? Give it a shot and let the deep bass roll.
Recommended Products

This instrument can bring simple and convenient, saving time, saving effort, efficiency to sound engineering installation and commissioning
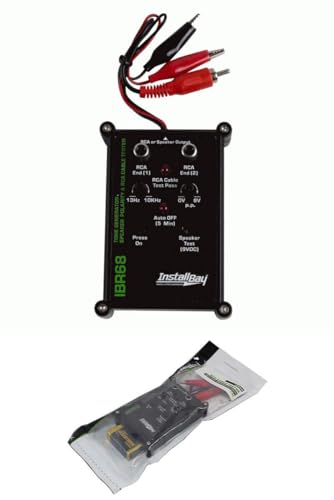
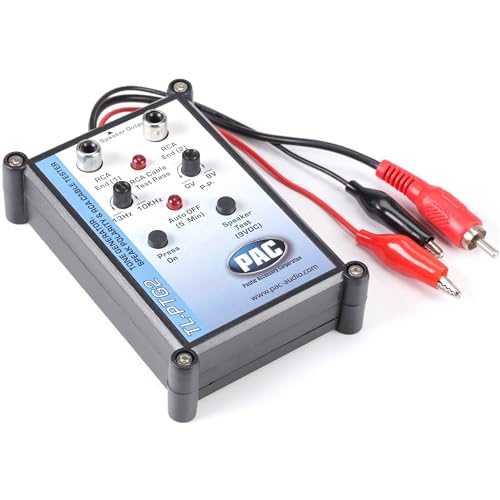
Tone Generator and Speaker Polarity Tester
Frequently Asked Questions
How Do I Protect Speaker Wires From Future Renovations?
I’ll tell you I’m protecting speaker wires by burying them in walls, because who needs future renovations? Use concealment strategies, coordinate with contractors early, and seal runs with conduit for lasting safety.
What Is the Best Method to Label Wires for Easy Troubleshooting?
I label wires with color codes for polarity and attach number tags at each end, so when you trace a line you instantly know which speaker it belongs to and which channel it serves.
Can I Use Existing Electrical Conduit for Speaker Cabling?
I can use existing electrical conduit for speaker cabling if it’s conduit compatible, but I’ll watch for signal interference; keeping cables separated from power lines and using shielded wire helps maintain clean audio.
How Should I Handle Speaker Wire When Installing Smart Home Devices?
I usually keep speaker wire tidy with zip ties and conduit, and I always make certain device grounding; did you know 78% of installations suffer interference without proper grounding? This prevents noise and protects smart home integrations.
What Are the Fire‑Rating Requirements for In‑Wall Speaker Cables?
I’ll tell you: you must use fire‑rated, plenum‑rated speaker cable for any in‑wall runs, because building codes require those ratings to limit flame spread and smoke production within walls.


