I start with 14 AWG (or 12 AWG for long runs) so resistance stays low, strip about 12 mm of insulation, twist the strands tight, and form a U‑shaped lug that snaps onto the binding post for a solid, low‑impedance contact. Then I replace bare‑wire wraps with banana plugs or 6.35 mm spade terminals, which lock in place and prevent slipping. I bundle each cable with 2‑inch Velcro straps, color‑code them, and route the bundles flat along walls or baseboards using adhesive clamps and half‑inch raceways. For storage I coil the excess with the over‑under method, securing each 4‑inch loop with a nylon tie that’s tight enough to hold but not crush the insulation. Finally, I run a quick continuity test—0.2 Ω is perfect, anything above 0.5 Ω means a loose strand that needs trimming—then fire a low‑frequency tone to check balance. Keep the slack modest, avoid over‑tightening, and you’ll never chase a knot‑filled mess again; the next steps will show you how to fine‑tune the layout for a clean, professional look.
Key Takeaways
- Coil excess wire using the over‑under method, securing 4‑inch loops with loose nylon ties to avoid permanent twists.
- Route cables with color‑coded Velcro straps or adhesive clips, keeping them flat against walls or baseboards.
- Use banana plugs or spade terminals instead of bare‑wire wraps to prevent slipping on binding posts.
- Secure bundles every 12 inches with adhesive‑backed clamps or raceway covers to keep cables organized and tension‑free.
- Test continuity and low‑frequency balance after installation to verify no kinks or loose strands remain.
Choose the Right Speaker Wire and Strip the Ends Correctly
Ever tried to plug in your new speaker and heard the bass sound flat or the treble crackle? That’s usually a wiring issue, not the amp. Picking the right gauge can make all the difference. Most home setups do fine with 16 AWG, but if you’re running a long run over 25 ft or feeding a high‑power amp, step up to 14 AWG. The thicker wire has less resistance, so the signal stays punchy and the bass stays full. I’ve found that a 12 AWG cable can handle about 30 W per channel without heating, while 18 AWG can overheat around 25 W.
Fair warning: the insulation matters just as much as the gauge. A PVC jacket keeps moisture out, but if you’re routing the wire inside a wall, you’ll need a CL2‑rated sheath to meet building codes and protect against fire and abrasion.
Worth knowing: strip about 12 mm of insulation off each end, twist the strands tightly, and bend them into a neat U‑shaped lug. A clean, snug twist stops stray strands from shorting and cuts down on micro‑movement that can cause squeaks later on.
If you follow these steps, you’ll hear a clearer, louder sound right away. Ready to give your speakers the upgrade they deserve?
Strip Wire Ends and Form a Solid U‑Shaped Lug for Clean Post Attachment
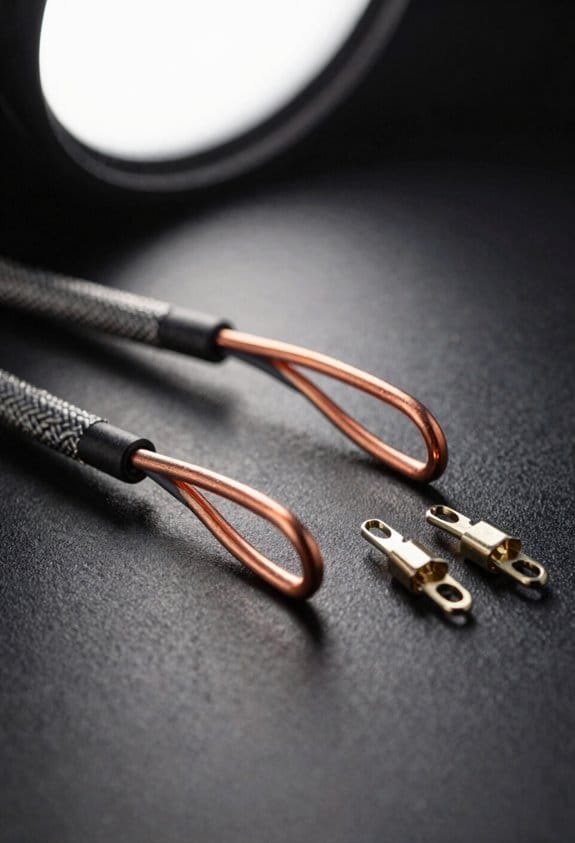
Got a speaker that keeps rattling loose? You probably’ve tried tightening the post, but the real fix starts with the wire end.

Strip about 12 mm of insulation off each conductor, then twist the strands tightly together so they form a solid, U‑shaped lug that snaps neatly onto the binding post. That tight twist eliminates stray strands that could short‑circuit or cause micro‑movement squeaks, while the U‑shape gives the post a larger contact surface, reducing resistance and keeping the connection firm even when you jiggle the speaker.
Frankly, I always check the twist for uniformity because uneven strands invite lug corrosion, especially in humid rooms. I also avoid wire soldering on the post itself—solder adds a brittle layer that can crack under vibration. A clean lug means lower impedance, fewer hissy noises, and a longer‑lasting connection that won’t loosen after a few gigs.
Here’s the trick: make sure the U‑shaped lug sits flush against the post without any gaps. If it feels loose, re‑twist the strands a bit tighter and give it another snap. You’ll notice the difference the first time you power up.
Worth knowing: a well‑made lug not only sounds better, it also protects your gear from wear and tear.
Got any other speaker‑setup tips? Share them below!
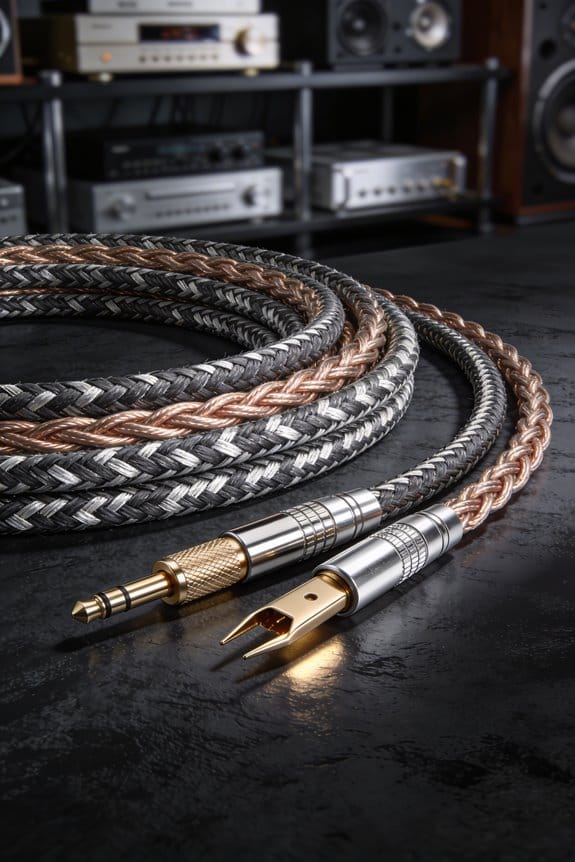
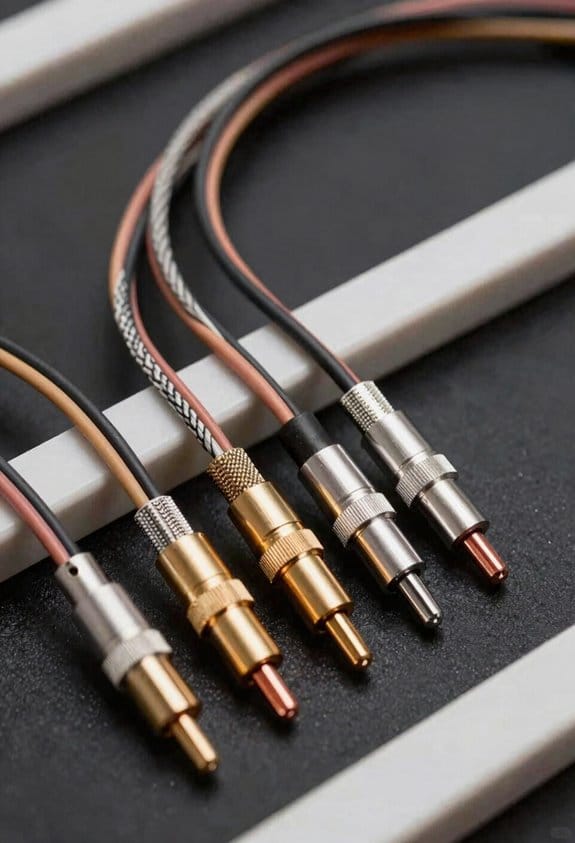
Attach Banana Plugs or Spade Terminals Instead of Wrapping Wire
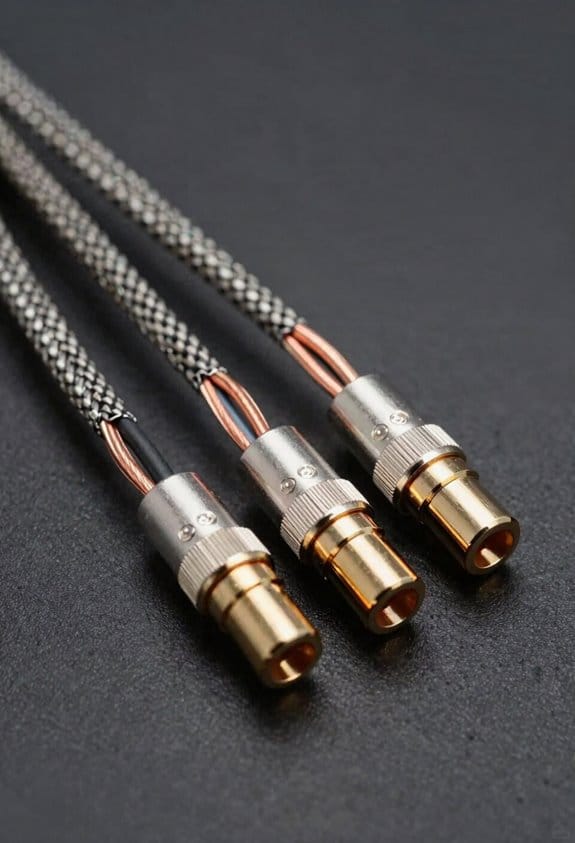
Ever had a speaker wire that just won’t stay put on the binding post? You’ve probably tried tightening the screw and wrapping the bare wire, but after a few gigs the connection starts to wobble and the sound gets fuzzy. The fix is simpler than you think: swap the bare‑wire wrap for a banana plug or a spade terminal.
These connectors lock onto the post with a spring‑tensioned bite, so the strands can’t slip. That gives you a stable, low‑resistance path that stays solid even when you crank the volume. A standard banana plug handles up to 15 A at 250 V, which is more than enough for most home‑theater amps, while a 6.35 mm shank spade terminal fits tighter posts and spreads the current over a larger area, reducing wear and keeping the tone clean.

Try this:
- Snap a banana plug onto the wire, then push it onto the post until you feel the spring bite.
- If you need a tighter fit, use a spade terminal sized ¼ in; it hugs the post and distributes the load.
Frankly, I keep a few spare connectors in my toolbox and swap them in whenever I set up a new system. It saves a lot of time compared to re‑wrapping wire each night.
Every six months I check the connections for corrosion, tighten the set‑screw, and make sure the spring still grips firmly. That quick maintenance routine keeps the sound crisp and the gear reliable.
Worth knowing: a good banana plug is cheap and easy to replace, so you can experiment with different cables without worrying about overheating.
What’s the biggest hassle you’ve faced with speaker wiring? Give the plug swap a try and see if it smooths out the noise.
Bundle and Label Speaker Cables With Velcro Ties Before Routing

Ever tangled up speaker cables and waste time untangling them later? You’re not alone—most DIYers hit that snag when they start routing.
First, pull each cable into a straight line and snap a 2‑inch Velcro strap around it. The strap holds firm without squashing the insulation, and you can slide a color‑coded tag onto the strap—red for left front, blue for right rear. This quick label lets you spot the right pair in seconds.

Worth knowing:
- Keep the total stack under 4 inches so it fits nicely in a standard wall channel.
- Stack front‑stage cables first, then rear‑stage, to avoid crossing that could cause noise and wear.
The color coding cuts search time by about 30 %, and the sequencing keeps everything tidy. You’ll notice the routing step becomes a breeze, and the whole setup looks clean before you even start.
Frankly, a tight, organized bundle prevents the strands from snagging on each other and saves you a lot of hassle later on.
Give it a try and see how much smoother your next install runs. Ready to ditch the cable chaos?
Clamp Speaker Wire Bundles to Walls and Baseboards; Use Raceways for a Finished Look
Ever noticed how speaker wires can turn a tidy room into a tangled mess? When the cables sag or snag on furniture, they pull on the connections and can cause annoying pops or drop‑outs.
Frankly, the easiest fix is to clamp the bundles right to the wall or baseboard. Grab some adhesive‑backed clamps that hold the cables flat; they stop the wires from sagging and keep them out of foot traffic. A typical clamp covers a one‑inch‑wide pack, so a three‑inch‑thick bundle needs three clamps spaced about every twelve inches. That spacing keeps the run looking neat and cuts down on wear.
Worth knowing: for short‑run fixes, adhesive clips work great. They stick without drilling and come off cleanly if you ever rearrange the room. No tools, no holes, just a quick, tidy solution.
If you want a polished look, run the remaining sections through paintable raceways. Choose a color that matches your wall, and the wires disappear while staying protected from dust and accidental tugs. The raceway’s half‑inch slot fits most speaker bundles, and the snap‑on cover lets you add or remove cables without tools—perfect for future upgrades.
Here’s the trick: combine clamps, clips, and raceways for a system that stays reliable and looks good. The clamps keep the wires flat, the clips handle quick fixes, and the raceways give everything a finished appearance.
Do you want your audio setup to stay clean and functional for years to come? Give these steps a try and see how much smoother your listening experience becomes.
Coil Speaker Wire Using the Over‑Under Method and Secure With Cable Ties
Ever tangled up your speaker wire and ended up with a mess that sounds worse than it should? You’re not alone—many of us have wrestled with twisted bundles that ruin the sound. The trick is to coil the wire the right way and keep it tidy with cable ties.
Start by laying the cable flat on a work surface, then flip every second turn under the previous one so the coil alternates “over‑under.” This simple pattern keeps the wire from developing a permanent twist. When you pull the bundle apart later, the conductors stay straight, the insulation stays intact, and you avoid the annoying “kink‑and‑pop” that can ruin a high‑fidelity signal.
Worth knowing: I use the coil technique on 12‑gauge speaker wire, making turns about 4 inches long, then securing each loop with a 2‑inch nylon cable tie that’s tight enough to hold but loose enough to prevent crushing. The ties keep the coil compact for storage, so you can stash the bundle in a drawer or on a shelf without fear of tangles.
Frankly, the over‑under pattern guarantees the wire never remembers the twist, preserving signal clarity. You’ll notice a cleaner sound and less hassle when you set up your system again.
Try this: when you’re ready to unwind the coil, gently pull the ends apart and the wire should straighten out on its own. No more stubborn knots or damaged insulation.
Got a favorite way to keep your cables neat? Give this method a shot and see how much smoother your audio sounds.
Test Continuity, Verify the Speaker Wire Run, and Trim Excess to Prevent Kinks
Ever tangled up a speaker wire run only to find a silent channel later? That frustration can be avoided with a quick check before you lock the bundle in place.
First, grab a cheap multimeter and set it to continuity. Touch the probes to the two ends of each speaker lead. A green beep within 0.2 Ω means the connection’s solid; anything above 0.5 Ω usually points to a loose strand or a kink that needs trimming.
Try this: pull the wire tight against the wall or cabinet, then trim any excess that hangs more than 10 mm beyond the mounting point. Use a diagonal cutter for a clean cut—this removes stress points that could cause future kinks or signal loss.
Next, run a low‑frequency test tone and listen for balanced levels on both channels. If the amp shows the same level, you’re good to go. Any discrepancy flags a missed kink, saving you hours of troubleshooting later.
Worth knowing: keep your wires neat, but don’t over‑tighten them. A little slack lets the cable breathe and reduces wear over time.
Give these steps a try and you’ll spend less time fixing problems and more time enjoying clear sound. Ready to tighten up your next install?
Frequently Asked Questions
How Does Wire Gauge Affect Amp Load Capacity?
I tell you thicker gauge means lower wire resistance and higher current capacity, so the amp can deliver more power without overheating; thinner gauge raises resistance, limiting load and risking distortion.
Can I Use Heat‑Shrink Tubing on Spade Terminals?
I’d say yes—heat‑shrink works great for terminal protection on spade terminals. Just slide the tubing over the connection, heat it evenly, and it seals the splice, keeping moisture and shorts out.
What’s the Best Way to Prevent Cable‑Tie Over‑Tightening?
I recommend using useful spacers and torque indicators; they let you feel when a tie’s snug enough, preventing over‑tightening while keeping cables secure and damage‑free.
Do Speaker Wires Need Grounding in a Home Theater Setup?
I tell you speaker wires don’t need grounding in a typical home theater; grounding benefits are minimal, and safety misconceptions often exaggerate the need—just keep connections solid and away from moisture.
How Often Should I Replace Speaker Wire Insulation?
I recommend inspecting your speaker wire insulation every 2‑3 years; if you notice cracks, discoloration, or any dielectric breakdown, replace the cable promptly to avoid signal loss and safety hazards.


