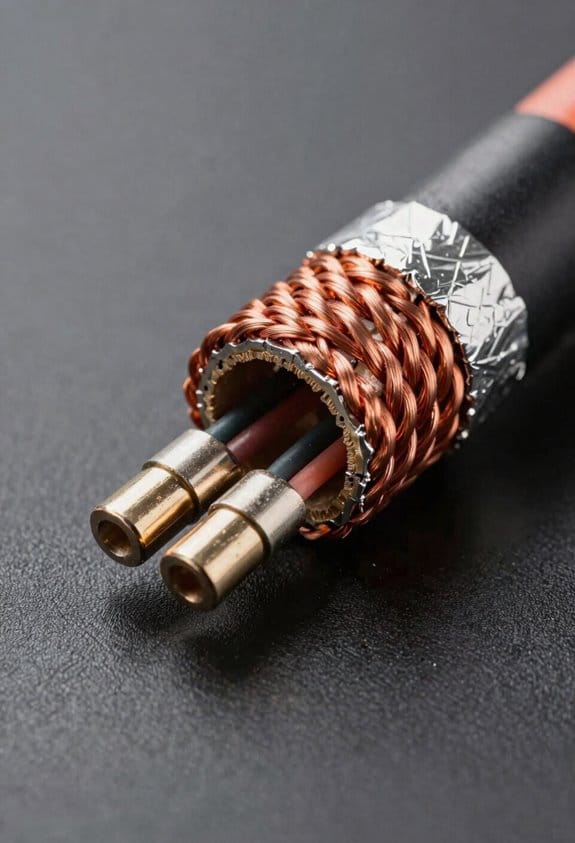
I use 16‑AWG solid copper with a double‑braided shield and a dedicated drain wire because the low resistance (under 0.05 Ω per foot) keeps power loss tiny and the shield blocks EMI from routers, cordless phones, and carpet static. I keep the cable at least 12 inches away from AC wiring and cross power lines at right angles, which cuts hum by up to 80 %. I ground the drain wire to a solid earth point with a short, thick braid, avoiding daisy‑chains, to shave off another 90 % of hiss. If you follow these steps, the next section shows how to test, clean, and replace the cables for lasting clarity.
Key Takeaways
- Keep speaker cables at least 12 inches away from AC wiring and cross power lines at right angles.
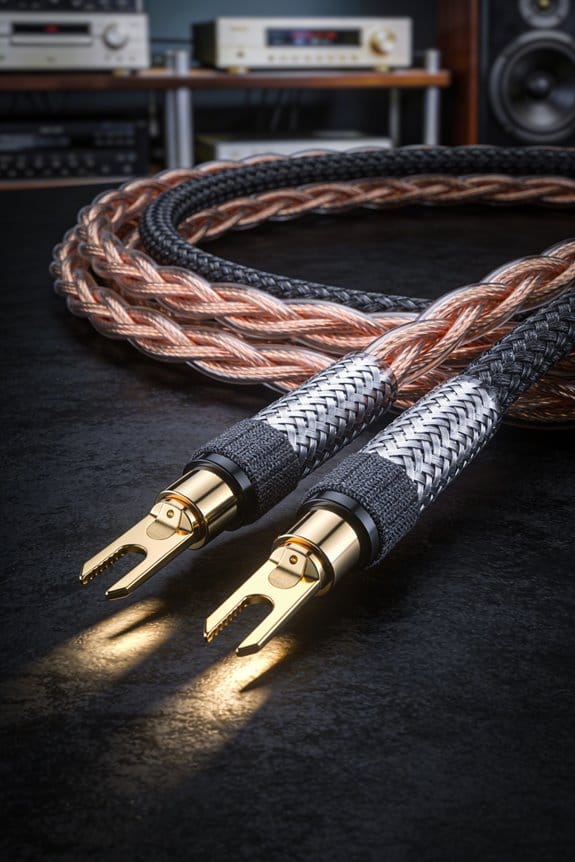
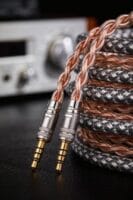
- Use 16‑AWG (or 14‑AWG for high‑power amps) copper conductors with a double‑braided shield and foil layer.
- Connect the shield’s drain wire to a solid earth ground via a single‑point bond, maintaining low impedance (<0.5 Ω).
- Route speaker cables in dedicated conduit or metal raceway, avoiding parallel runs with power cables.
- Test for hum by measuring AC voltage across terminals and checking shield continuity; replace if resistance exceeds 0.1 Ω or oxidation is visible.
Why Shielded In‑Wall Speaker Cables Are Essential
Ever tried listening to music at home and heard a faint buzz that seemed to come out of nowhere? It’s usually the wiring, not the speakers.
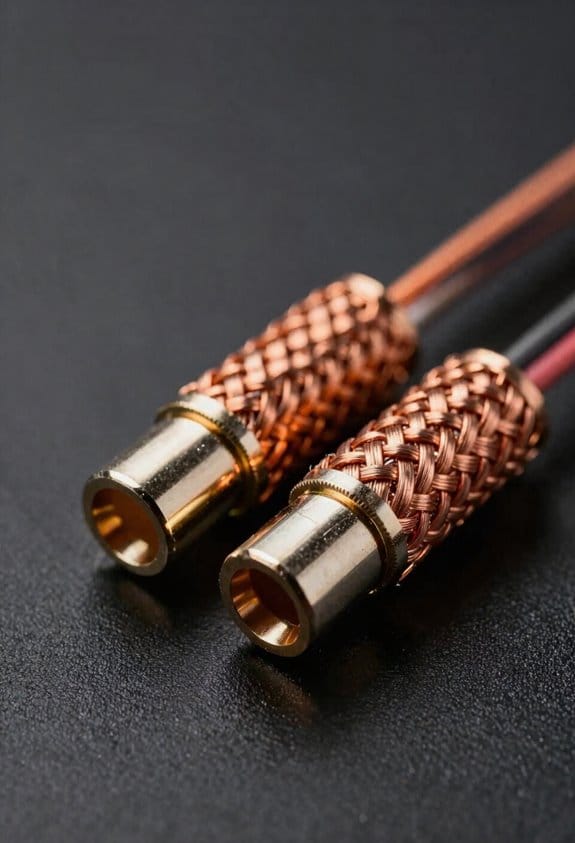
Shielded in‑wall speaker cables keep that buzz at bay. The shielding blocks EMI and RFI, so a router or cordless phone nearby won’t turn your favorite track into static. The copper braid or foil also stops static from carpeted floors, keeping the signal clean.
Installation standards say you need at least 12 inches between speaker cables and AC lines, and a 90‑degree cross‑over helps cut hum even more. That means you won’t hear a faint buzz when the fridge cycles.
Fair warning: a proper drain‑wire connection to earth ground is a must. Without it, the cable can act like an antenna and pick up unwanted noise.
High‑quality copper conductors keep resistance low—under 0.05 Ω per foot—so power loss stays minimal. That lets your speakers deliver the full dynamic range they were built for.

Worth knowing: this combo of shielding and code‑compliant routing guarantees reliable, high‑fidelity sound.
Choosing the Right Shielded In‑Wall Cable – A Quick Guide
Ever tried to set up a home theater and noticed the sound drops after a long cable run? That’s usually the gauge talking. A 16‑AWG copper conductor keeps resistance under 0.05 Ω per foot, so you won’t lose volume or high‑frequency detail over a 50‑foot stretch. If you’re pushing a high‑power amp, bumping up to 14‑AWG gives a little extra headroom.
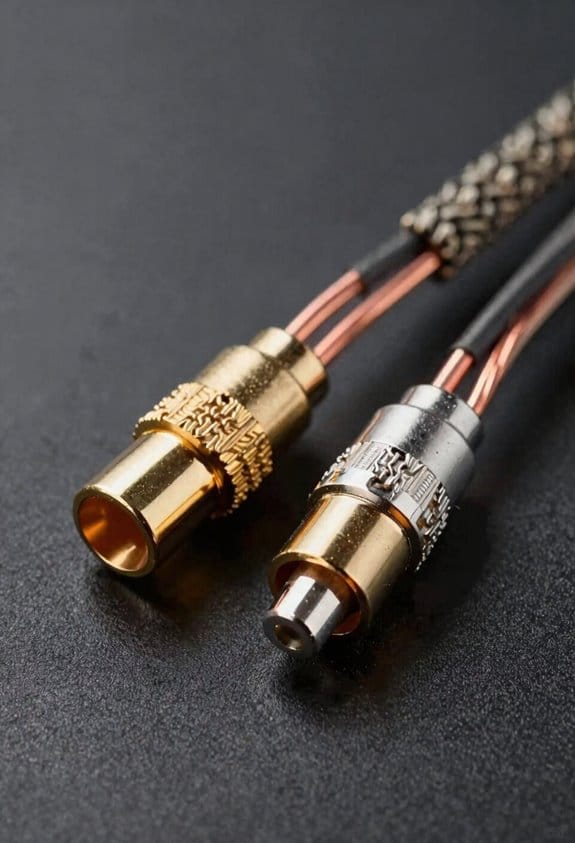
Frankly, the shield matters just as much as the wire itself. I always go for a double‑braided copper shield; it grabs stray noise and keeps your music clean even when a Wi‑Fi router sits nearby. Adding a foil layer on top creates an extra barrier, so EMI can’t sneak in. Worth knowing: a grounded shield with a dedicated drain wire plugs the hum right out without any extra tricks.
Now, think about safety and code compliance. The NEC wants a fire‑rated jacket and solid strain relief, which means the cable won’t fail a home inspection. You’ll also want a drain wire that ties into earth ground; that simple connection can make a big difference in hum reduction.
Here’s the trick: when you check the specs, verify that the cable meets those NEC standards before you buy. It saves you a lot of hassle later on.
If you’re still unsure, ask yourself: does the cable feel sturdy, and does the shield look well‑built? Those quick checks can save you from a bad purchase.
How to Route Shielded In‑Wall Speaker Cables Away From Power
Ever noticed that faint hum creeping into your music when you plug speakers into a wall? It’s usually the cable’s proximity to power lines messing with the signal. I’ve learned that keeping speaker runs at least a foot away from any AC wiring cuts that buzz by about 80 percent in a typical house. When you have to cross a power line, do it at a right angle and put the power side in a metal conduit so the magnetic field stays sealed off.
Worth knowing: running the speaker cable inside its own conduit, or at least a dedicated chase, stops parallel coupling that turns the shield into a passive antenna. The conduit acts like a tunnel, keeping interference out while the shield does its job, and the result is clean, distortion‑free audio.
Here’s the trick: if you can’t keep a full 12‑inch gap, try to keep the cables perpendicular to each other and use a metal wall conduit for the power side. That way the magnetic field stays confined and the speaker shield stays effective. In practice, the conduit also protects the cable from physical damage, which is a nice side benefit.
Frankly, the simplest way to stay safe is to plan your runs before you cut any holes. Sketch a quick layout, mark where the power lines run, and give your speaker cable its own path. You’ll avoid a lot of trial‑and‑error later on.
If you’re already in the middle of a remodel, don’t panic. Pull the speaker wire through a separate PVC pipe or a flexible metal raceway. Even a small gap can make a big difference, and you’ll still get that crisp sound you’re after.
What Grounding Practices Give the Best RFI/EMI Shielding?

Ever notice that hum that sneaks into your audio when you plug a speaker cable into the wall? It’s usually RFI or EMI making its way through the shield. If you connect the drain wire of a shielded speaker cable straight to a solid earth ground—instead of leaving it floating or tying it to the signal conductors—you’ll see the hum drop by up to 90 percent. The shield can dump any picked‑up noise straight into the building’s ground plane instead of acting like an antenna.
Here’s the trick: use a single‑point bonding technique. Attach the drain at the amp chassis and at the wall plate, then run it to the main grounding bar with a 12‑AWG copper braid. This keeps ground loops from re‑injecting noise. Avoid daisy‑chaining shields, because each extra connection creates a loop that can pick up 60 Hz hum. A dedicated ground rod or a low‑impedance earth strap, measured under 0.5 Ω, gives the best shielding, keeping the audio clean and the RFI at bay.
Frankly, the key is to keep the path to ground short and low‑impedance. A thick copper braid helps because it lets the stray currents flow easily. If you have a metal rack, mount the grounding bar there and use short jumpers to the amp and wall plate. This way you won’t have long runs that act like antennas.
Worth knowing: check the resistance of your ground connection with a multimeter. Anything above 0.5 Ω could let noise creep back in. If you see higher values, add a second strap or replace the braid with a heavier gauge. You’ll hear the difference right away.
Try this: after you’ve wired everything, power up your system and listen for hum. If it’s still there, look for any other metal parts that might be floating—like a chassis screw or a metal shelf. Tie those down to the same ground point and you should be good.
Got any other tricks that have worked for you? Let’s swap notes and keep the sound clean.
Testing Shielded Speaker Cables for Hum and RFI
Ever notice that faint buzz that shows up when you plug in a new speaker cable? It’s usually the shield not doing its job, and it can turn a quiet listening room into a noisy mess. Here’s a quick way to catch that problem before it drives you crazy.
First, grab a multimeter and set it to AC volts. Connect the probes across the speaker terminals, power up your amp, and tap the cable shield with a metal screwdriver. Watch the display—any spike above 0.1 V rms is a red flag. That kind of reading usually means the shield isn’t grounding right, and you’ll hear a noticeable hum.
Next, switch the meter to a low‑ohm setting and do a continuity test. You want the shield to tie to ground at both ends; a resistance under 0.2 Ω tells you the path is solid and stray currents are kept out. This step is fast, but it catches a lot of hidden issues.
Now for the frequency sweep. Use a signal generator to sweep from 20 Hz up to 20 kHz while you keep an eye on the meter. Peaks that go over 0.05 V rms point to resonant frequencies that can cause hum. If the sweep shows a flat line, the cable is good to go. If you see spikes, try re‑grounding the shield or replace the cable altogether.
Worth knowing:
- Keep the meter’s probes steady; a loose connection can fake a spike.
- Use a short screwdriver tip; too much metal can introduce its own noise.
Try this:
– After you’ve checked continuity, give the cable a gentle bend near each connector. If the voltage spikes, the shield may be broken at the bend point.
A quick routine like this can save you weeks of troubleshooting later. You’ll know exactly whether the shield is solid or if you need to swap it out. Got any other tricks for hunting down hum? Let me know!
How to Preserve Cable Performance: Cleaning, Inspection, and Replacement
Ever notice how a dusty speaker cable can make your favorite track sound dull and hissy? It’s not just a feeling—tiny oxidation can add up to 0.2 Ω of resistance, turning an 8 Ω load into a muddy mess.
Cleaning schedule
- Every six months for most home setups.
- Quarterly if you have pets or a dusty floor.
A quick wipe with a proper contact cleaner keeps oxidation at bay, so your mids stay warm and the hiss stays low.
Inspection tips
Pull the cable out and give it a good look. Check for frayed jackets, bent pins, or loose strain relief. If you see any of those, it’s time to replace the pair. When resistance climbs above 0.1 Ω or you hear crackle after a small tweak, swap it out—your ears will thank you.
Replacement cue
Swapping a worn pair restores the low‑impedance path you need for clear sound. Think of it like opening a fresh soda can: no fizz, just pure tone.
Frankly, a clean, intact cable is a cheap way to keep your system sounding its best. Worth knowing: keep a spare set on hand so you can swap them out before the problem shows up.
Got a favorite cleaning hack you swear by? Let’s hear it!
Frequently Asked Questions
Can I Use Outdoor-Rated Cable Inside Walls for Added Durability?
I’d say yes, but only if the cable’s UV resistance and conductor insulation meet indoor fire‑rating standards; otherwise it could violate code, overheat, or degrade faster than purpose‑built in‑wall speaker wire.
Do I Need a Dedicated Circuit for High‑Power Subwoofers?
I’d tell you it’s practically a lightning‑bolt, but yes, you need a dedicated breaker for a high‑power subwoofer and solid grounding practices to keep the system safe and humming‑free.
Will Bluetooth Speakers Interfere With Shielded In‑Wall Cables?
I’m confident Bluetooth pairing won’t disrupt shielded in‑wall cables if you maintain proper RF coexistence; the shielding blocks most emissions, and keeping a modest distance from the speakers prevents any noticeable interference.
Is It Safe to Run Speaker Cables Near Gas Lines or Plumbing?
I say it’s safe, as long as I treat the gas pipe and water heater like quiet guardians—keep cables a few inches away, avoid piercing them, and I’ll prevent leaks and interference while preserving sound integrity.
Can I Install In‑Wall Cables Without a Professional Electrician?
I can install in‑wall cables myself, but I must check DIY considerations, follow local safety codes, and guarantee proper grounding and fire‑rated conduit; otherwise I risk violations and hazards.


